Omnis Technical Note TNEX0007 Updated March 2022
Linux Headless Server Deployment inside Docker
For Omnis Studio 10.x
By Andrei Augustin, Tech Support
What is Docker?
Docker is an amazing tool designed to make it easier to deploy applications by the use of so-called containers. The containers allow you to create a package of your application with all the parts it needs to run, such as the libraries and dependencies and then deploy all of them together in a single, organized container. The advantage is that the developer can be assured the container will run on any other machine via Docker, regardless of the machine customisation and settings.
Therefore, Docker can be compared to a Virtual Machine.
However, unlike a Virtual Machine, Docker will use the same kernel as the hosting system while a Virtual Machine will create an entire virtual operating system.
This gives an enormous performance boost which can be very useful for older servers.
Where can I get Docker?
You can easily download Docker Desktop from their official hub. The following link contains both macOS and Windows Docker Desktop downloads: https://www.docker.com/get-started
If you are using Linux, you can open the following guide on Docker's website: https://docs.docker.com/install/ and on the left menu, you can click on Linux to see the different distros which are currently supported.
How to test if Docker is installed
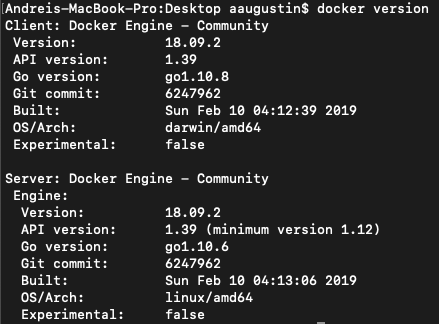
You can easily check if docker is installed by opening your terminal and running the command docker version:
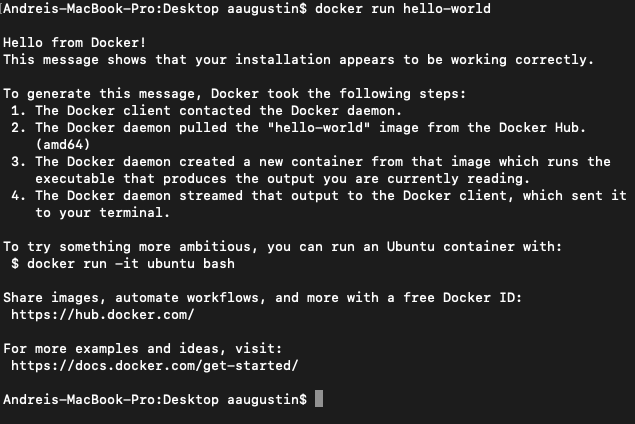
You can also test your installation and connection by running the hello world image from Docker official servers. You can do so by running the following command: docker run hello-world.
How to run Linux Headless Server inside of a Docker Image
We can now start to create our own Docker Image which will contain Ubuntu, our Linux Headless Server and our Omnis application.
The first step is to create a folder which will contain our project. You can put this folder wherever you wish and you can also give it any name, I put mine on Desktop and called it Docker.
Now, we need to create a folder inside the Docker folder and call it ohsvr10. This ohsvr10 folder will contain the Linux Headless Server files which are available here:
https://omnis.net/developers/resources/download/index.jsp
Download the "Linux (64-bit) Headless Server": omnis-headless-app-server-10.x.x.tar.gz
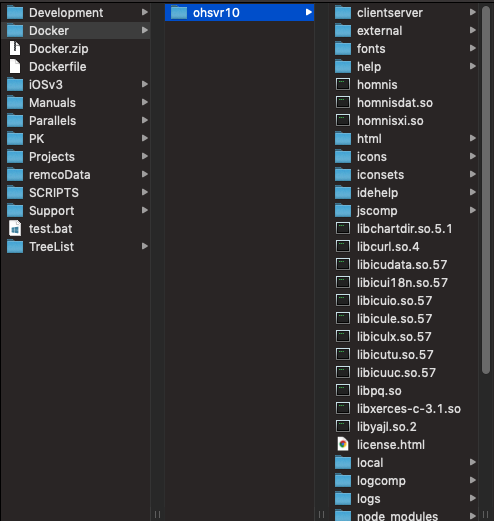
You will have to extract the files from inside the tar. Now your project folder should look similar to this:
Now that we have our headless server files, we need to serialise and set the port for Omnis. In order to serialise it, we can create a serial.txt file inside ohsvr10. The serial.txt will have to contain the following:
SN=xxxxxx
Where xxxxxx is our serial number.
For the port, we can go to ohsvr10/studio/config.json and edit our port entry, I have set mine to 9800 for this example.
Once we finished serialising and setting our port, we can create a new file inside our main folder and call it Dockerfile:

The Dockerfile is used by Docker to build the Docker image. We will now have to specify the details for Docker to build our Docker image inside the Dockerfile:
FROM ubuntu:18.04
WORKDIR /home
ADD ohsvr10 /home/omnisserver
ENV LD_LIBRARY_PATH /home/omnisserver
RUN apt-get -q -y update
RUN apt-get -q -y install \
libpango1.0-dev cups libev4
EXPOSE 9800
CMD omnisserver/homnis
In the first line we are importing version 18.04 of Ubuntu from Docker's official servers. The second line will set the working directory to /home and then to move our ohsvr10 contents into /home/omnisserver.
We then take care of the environment's dependencies and install the libpango and cups shared libraries which Omnis requires in order to work smoothly.
Towards the end we do EXPOSE 9800 which will open port 9800 inside Docker and then we simply start the homnis executable inside the omnisserver folder in our Ubuntu environment which lives inside Docker!
Now that we have saved our Dockerfile, we can start the build process. In order to start the build process, we can execute the following command:
docker build Docker/ -t ohsvr10
Where Docker/ is our main project directory (make sure you give the path to the directory if you are not in the same directory as the project folder) a d ohsvr10 is the name of our Docker Image.

This will now start the building process which may take some time:
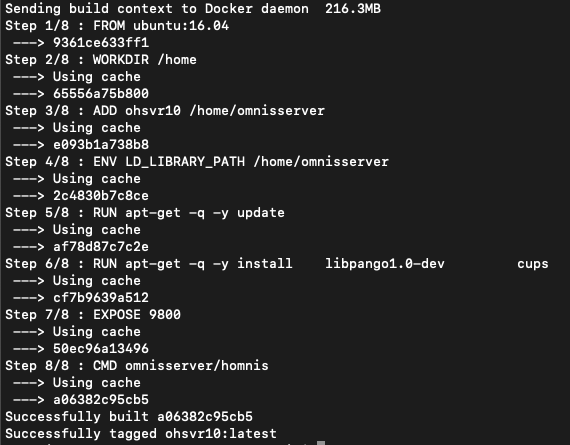
At the end you will see the message Successfully built and tagged.
All there is left to do now is start our docker image with the following command:
docker run -p 4000:9800 ohsvr10
Where 4000 is the port you want to dedicate on the host machine and 9800 is the port you want to be used inside the Docker image and where ohsvr10 is the name of your Docker Image.
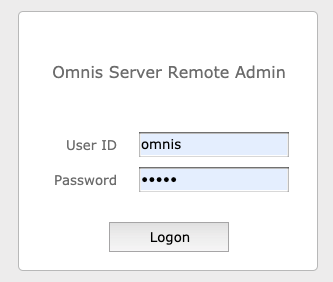
Once you execute the command, you will not see any confirmation of it working so let's make certain that it does work. We can fire up our web browser and navigate to 127.0.0.1:4000/jschtml/osadmin.htm where we should now see the Omnis Server Remote Admin library which default user ID is omnis and password is 0mn1s.
That is it! We now have our Omnis headless server running inside of a Docker Image.
There are a few more commands which can help you a lot:
docker image ls - shows available docker images:

docker image rm -f *imageID* - forcefully deletes the Docker image. Your Docker Image will not be recoverable after this command.
docker ps - shows current running containers:

docker stop *containerID* - You can use this command to stop a running Docker image:

 Facebook
 Github
 Instagram
 Linkedin
 Twitter
 Youtube
 Please logon or create a free account to download this file.
