Omnis Technical Note TNJC0003July 2013
JavaScript Components: Data Grid
for Omnis Studio 6.0 or above
Omnis provides several different JavaScript components for displaying data in a list or grid layout in your web and mobile apps. Single columns of data can be displayed simply using the 'List' component, while hierarchical data can be displayed in a 'Tree list'. For more complex data sets that need to be laid out in rows and columns, a 'Data grid' or 'Complex grid' can provide the option of horizontal and vertical ruling lines and formatted header sections. This tech note describes the Data Grid JavaScript component.
Data grids can display character and numeric data in a grid like structure, much like a table or spreadsheet format. The data contents for the data grid is supplied from a list variable which is specified in the $dataname property of the data grid control. You specify the number of columns in the grid object itself in $designcols, and for most cases this would correspond to the number of columns in your data list. To map the list data to the columns in your grid control you need to set $columndatacol for each column in the grid (you can set properties for individual grid columns under the Column Tab in the Property Manager) using the column name or number in $columndatacol. When you are designing your grid control, the $movecolumn property is very useful since it allows you to move a column to the specified position in the grid.
The $hasheader property specifies whether or not the grid has a main header, while $headertext specifies the text for the header. You can make the headings bold by setting $::boldheader. The $columnnames property lets you specify the heading text for each column in the grid, which do not have to be the same names as the column names in your data list variable. The column names are specified as a comma separated list of names. You can set up the widths of the columns by specifying a comma separated list of integer values in $::columnwidths.
The end user can enter data into the cells of the grid if $enterable is enabled, and the grid can grow by adding more lines to accommodate more data if $extendable is enabled. The height of the rows in a data grid adjusts to fit the data automatically, unless you specify a height in pixels in $::rowheight.
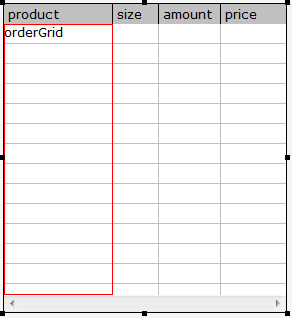
The Webshop sample app, available in the Hub in the Studio Browser under the Applets option (in the Welcome window in older versions), uses a Data Grid to display a list of products that have been ordered in the main product catalog. In the library, open the jsShop remote form and take a look at the data grid control which is called ‘orderGrid’ and is seen here in design mode:
Click on the data grid and examine its properties in the Property Manager (press F6/Cmnd-6). You can click on each column (outline is red) and examine its properties under the Column tab. The $dataname of the data grid is set to iOrderList which is defined from a table class T_qOrders which is linked to a query class qOrders (the data classes are in the ‘database_layer’ folder in the library). When the jsShop form is opened, the $construct method behind the data grid defines the list from the table class.
; $construct behind the data grid
Do iOrderList.$definefromsqlclass($tables.T_qOrders)
The $construct method behind the table needs to be triggered when the form is opened (this does not run automatically like the form construct), so a message is sent from the $construct of the form to the fields in the form, which in this case includes the method behind the data grid control. The command line in the form $construct is:
Do $cinst.$objs.$sendall($ref.$construct()) ;; sent to $construct in all form fields
When the end user clicks the ‘Order Now’ button in the shop form, the data for the selected product and size/type is passed to the process_order method (as value 1, 2, or 3 in the pButtonNumber parameter), which inserts the data into the list (after a check to see if the user has already ordered the same product) and the data grid is redrawn. The process_order method is as follows:
; process_order class method in the jsShop form contains
pButtonNumber
; parameter (Short Int) to receive the value of the product button clicked
If iProductList.product_price_[pButtonNumber]>0 ;; price must be greater
than zero
Do iOrderList.$search(
$ref.order_product_id=iProductList.product_id
&$ref.order_size=iProductList.product_size_[pButtonNumber],
kTrue,kFalse,kFalse,kFalse)
If iOrderList.$line ;; found one so increment existing order
Calculate iOrderList.order_amount as iOrderList.order_amount+1
Else ;; new one so add to iOrderList
Do iOrderList.$add(
#NULL,#D,iProductList.product_id,iProductList.product_name,
iProductList.product_size_[pButtonNumber],
1,0,iProductList.product_price_[pButtonNumber])
Do iOrderList.$line.$assign(iOrderList.$linecount())
End If
Calculate iOrderList.total_price as
iProductList.product_price_[pButtonNumber]
*iOrderList.order_amount
Do $cinst.$objs.checkOutBtn.$enabled.$assign(
iOrderList.$linecount()>0)
Do $cinst.$objs.orderGrid.$redraw()
Else
Do $cinst.$clientcommand('yesnomessage',row(con('Would you like
to order >'
,iProductList.product_size_1,'< instead?'),'Not available','$orderYes'))
End If
There are many other properties and powerful functionality in the data grid control which is described in the 'JavaScript Components' chapter in the 'Creating Web & Mobile Apps' manual which is available here on the Omnis website.
You can download the library from Github: https://github.com/OmnisStudio/Omnis-JSWebshopApplet (requires Studio 8.1.2 or above)
You can visit the JavaScript Apps Gallery to try out further JavaScript components.

 Facebook
 Github
 Instagram
 Linkedin
 Twitter
 Youtube
 Please logon or create a free account to download this file.
