Omnis Technical Note TNJS0012June 2021
Import a file into SQLite and create a web or mobile form
for Omnis Studio 10 or above
By Omnis Engineering
This tech note describes how you can import a simple spreadsheet or text file and create a Remote form that can be viewed in a web browser on a desktop computer or mobile device. You can use the Application Builder to import the file, create the SQLite database and Omnis library, and create the Remote form – within 10-15 mins you can work through the necessary steps here and view your data in a web browser.
This tech note is suitable for anyone new to application development, those evaluating Omnis Studio, or existing Omnis developers (Omnis 7 'classic', Omnis Studio 6 or 8) wishing to look at some of the new features, such as the JavaScript Client, in the latest version Omnis Studio 10. You can download a 90-day Free Trial of Omnis Studio 10.x, for Windows or macOS (after registering, download the Development Edition for your platform) – you can work through this tech note on either platform, and run the finished app on any device or platform.
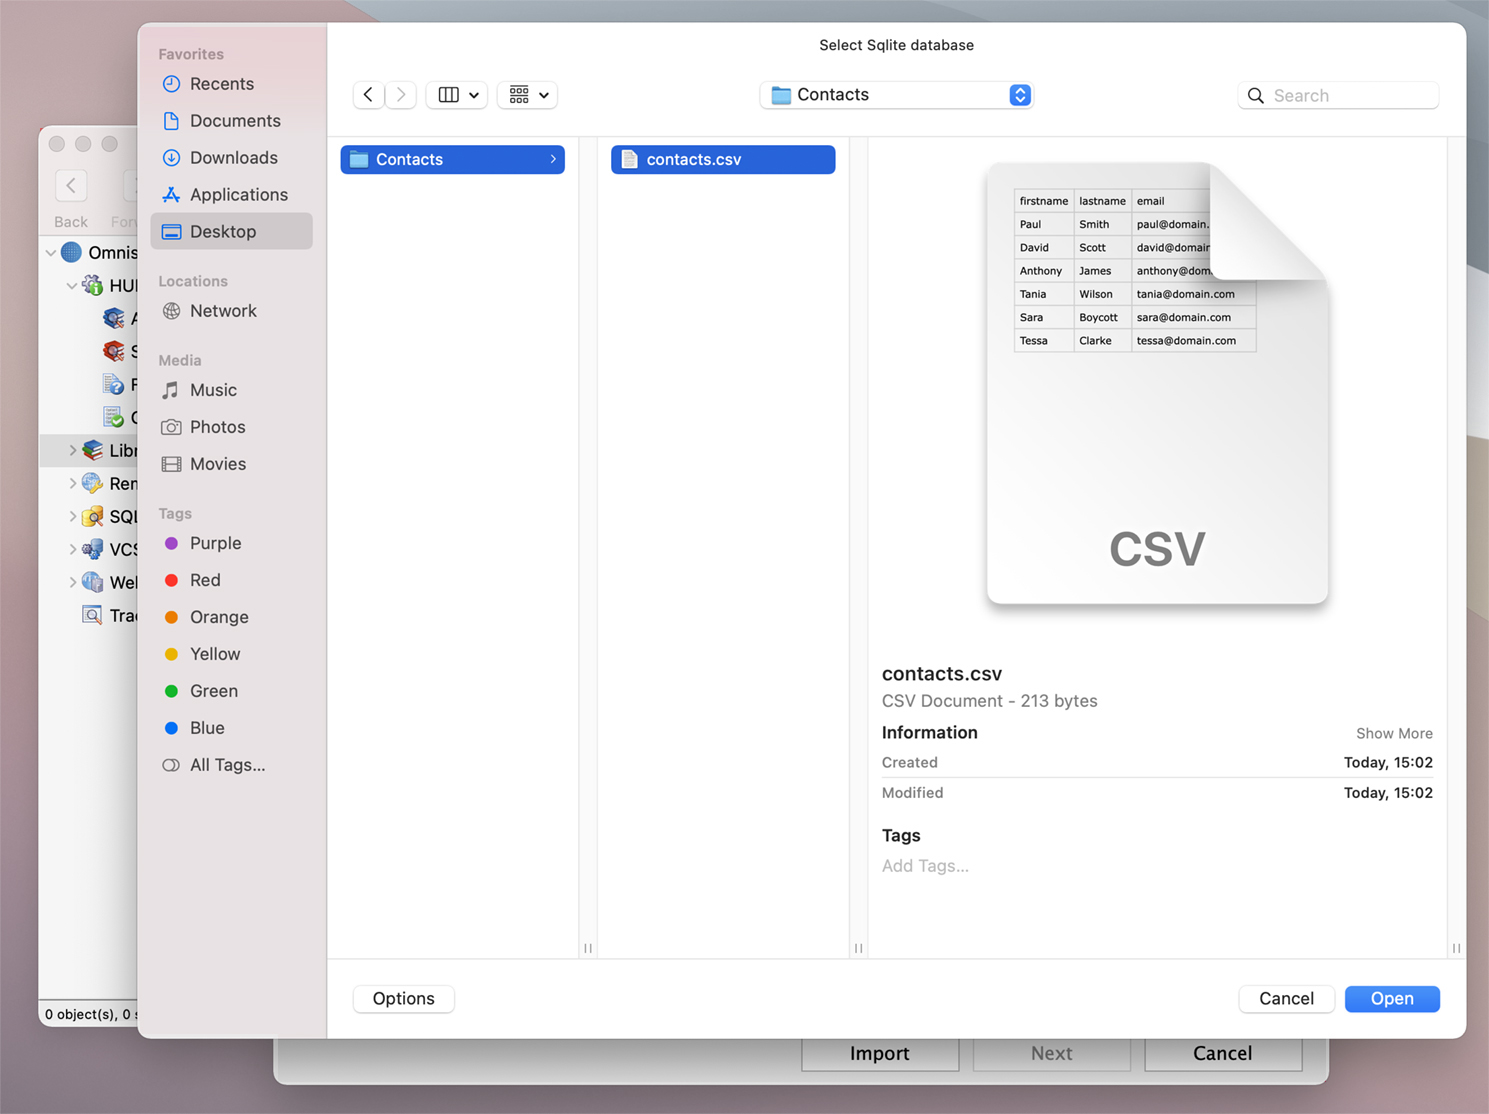
You can use the file we supply here: contactsapp.zip, which contains a simple list of contacts, or use your own data. You need to start with a comma- or tab-separated values file (.CSV or .TSV) either exported from a spreadsheet file or other system, or you can use a text file assuming it has comma or tab separators – the data file must be 'clean' and consistent, with the correct number of data elements for each row and matching the number of column headings.
Import the file and create the library
Open Omnis Studio 10, and in the Studio Browser click on Libraries, New Library and then the Import Data option.
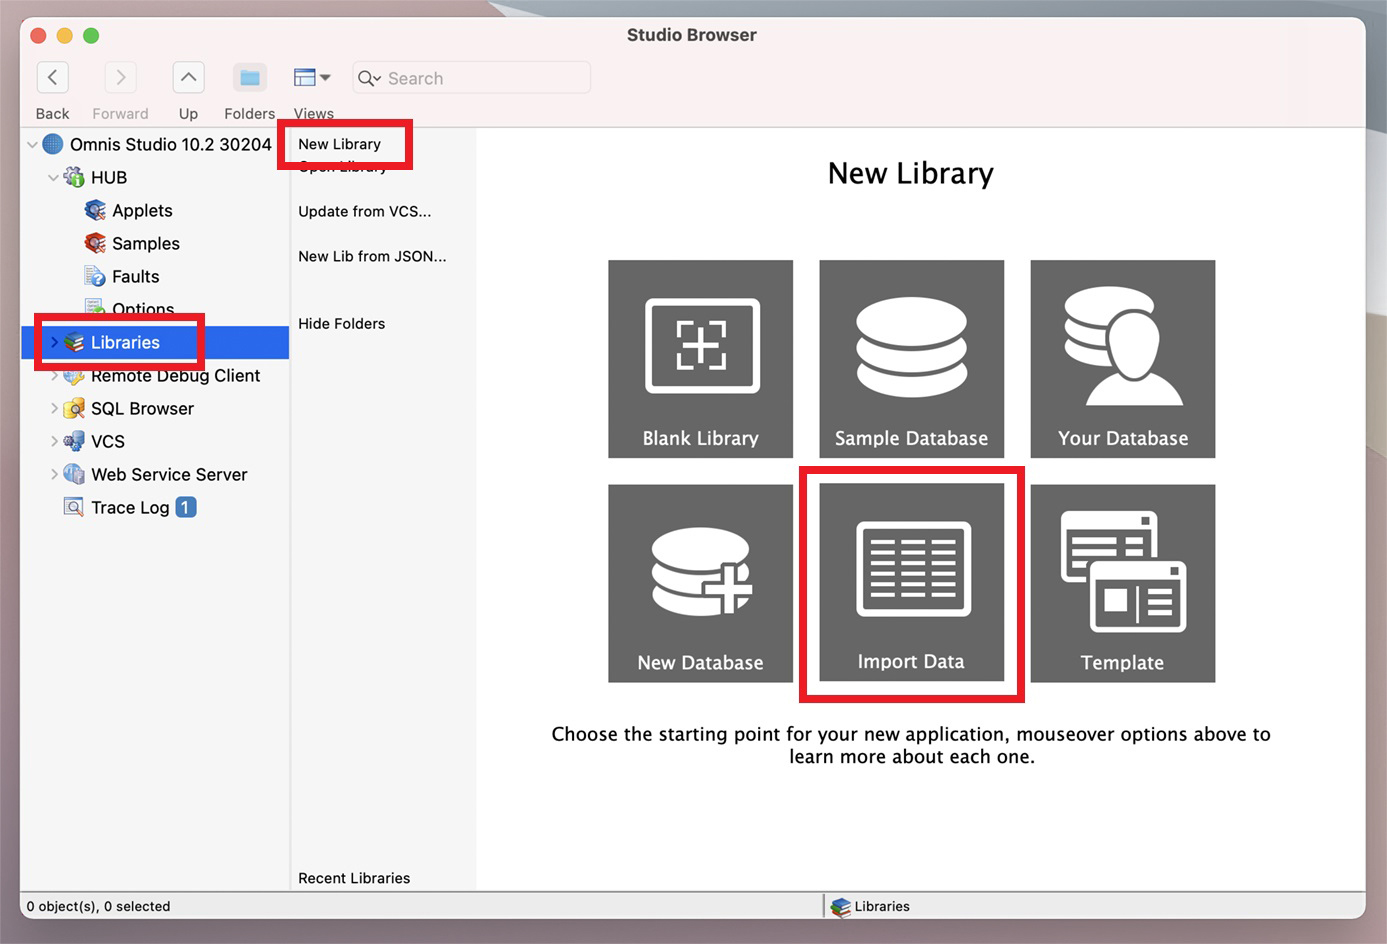
The New Library option launches the Application Builder that allows you to quickly and easily build an Omnis application based on a number of templates including a sample database, your own database, creating a new database, or various layout templates – we will use the Import Data option.
Next to the Path option click on the + icon and locate the contacts.csv file you downloaded from this page, or use your own file – the location of the file is not important since the data will be imported into SQLite and stored in the Omnis folder.
Under File Format, you can choose the Comma- or Tab-separated values file format – we’ll keep the default .CSV format and ensure the ‘Has Column Headings’ option is checked (the column names in the first row of the import file are used as column names in your database table).
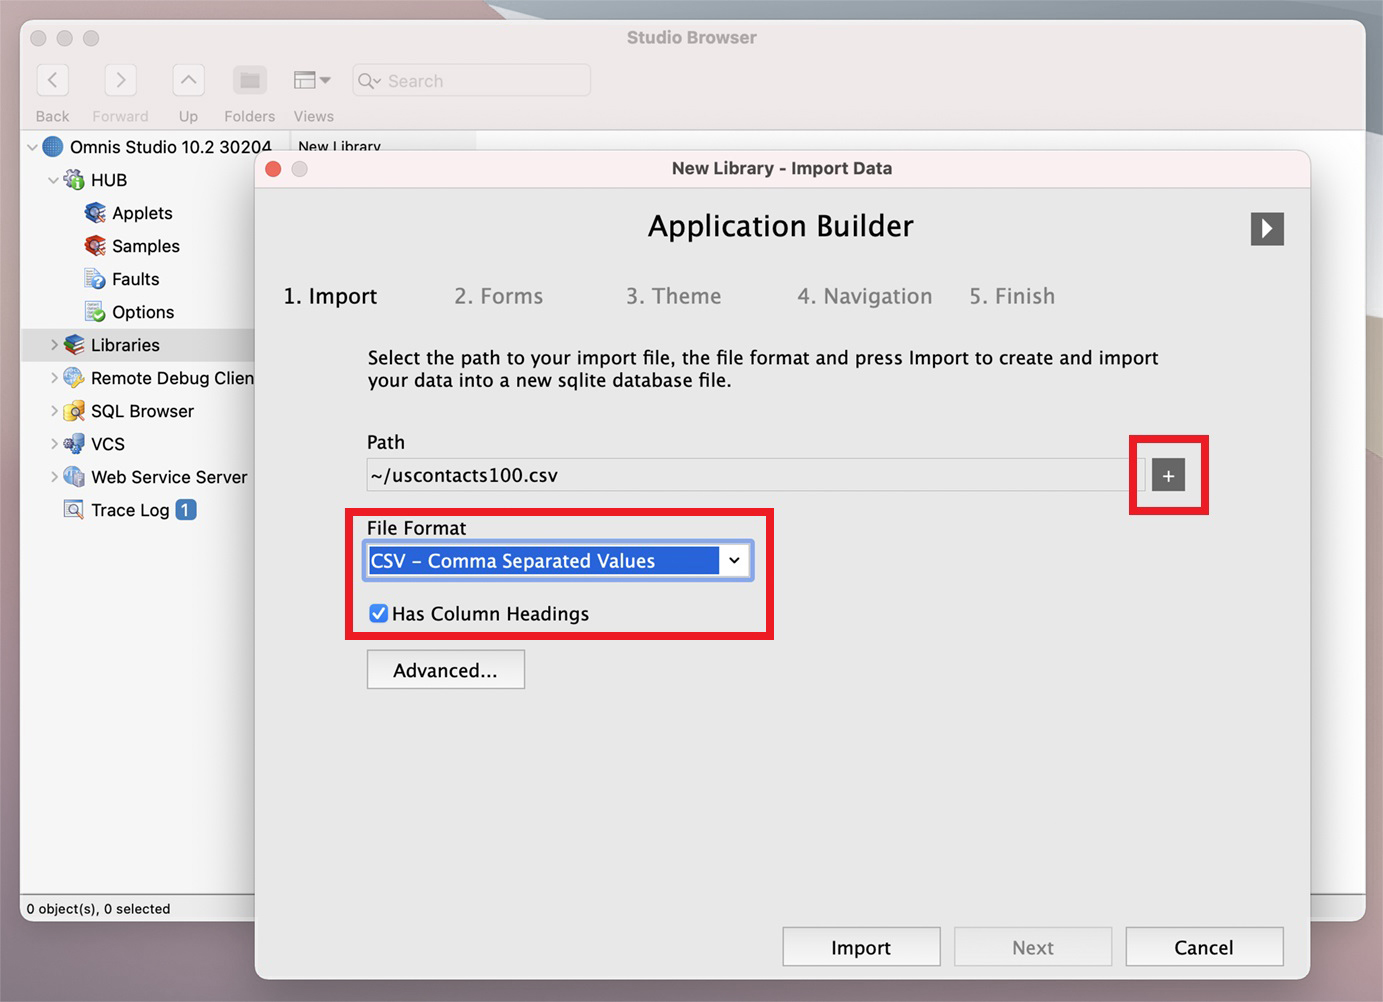
Click on Import and then Next to proceed.
Next in the Application Builder you can select the type or layout of the web form(s) (remote forms) you want in your application – we’ll accept the default Enterable Grid, but if you do not want your end users to be able to edit the data you can select Display Grid – in the 3rd column you can see the columns from your imported file (with the prefix Col_).
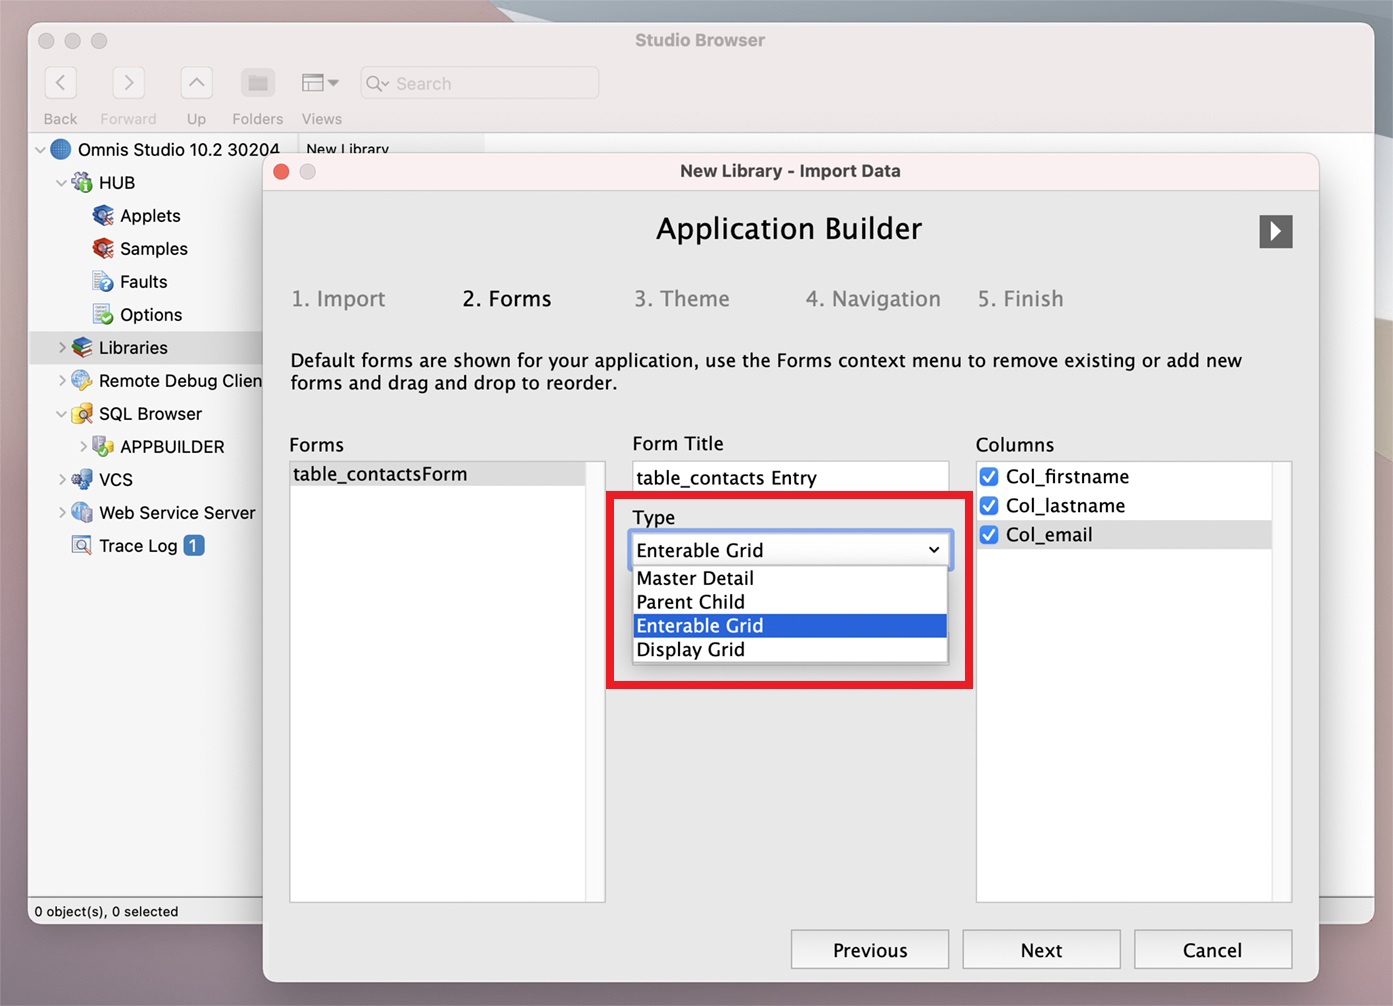
Click on Next to proceed.
Next you can accept all the default options in the Application Builder including the default Omnis Theme option (this provides a coordinated set of colors for your web forms), and if you want you can upload your own company or brand logo (this is displayed on the intro screen of your app), otherwise use the Omnis logo.
Under the Navigation option, enter a name for your application, for example, enter: Contactsapp – this name is used to name the application (Omnis library) file name stored in the Omnis folder.
Then just accept the default options for navigation (Native List and Navigation Menu for the web and desktop layouts). When you click on Next Omnis prompts you for a location for your app – accept the default ‘myapplications’ folder.
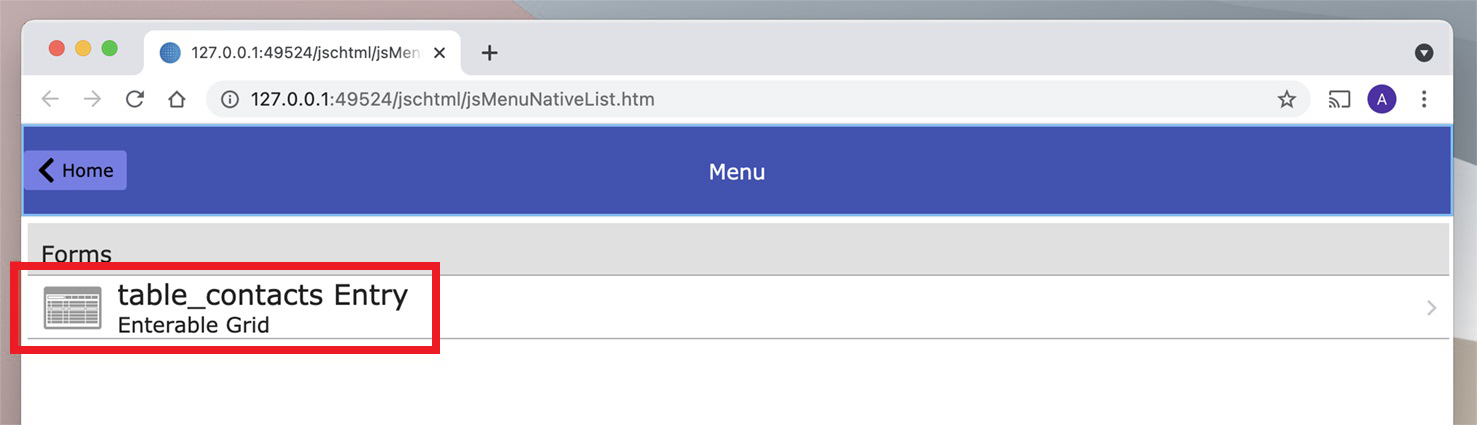
Under the Finish option click on ‘Test Web Application’ to open your application in your default web browser, for example Safari or Chrome. Click on the logo on the Intro screen, then in the list click on table_contacts Entry (this will have a different name if you imported your own file).
You should now see your data in a grid format – if you used our contacts file you should see 3 columns of data including a column for firstname, lastname, and email, plus there are buttons for searching and managing the data.
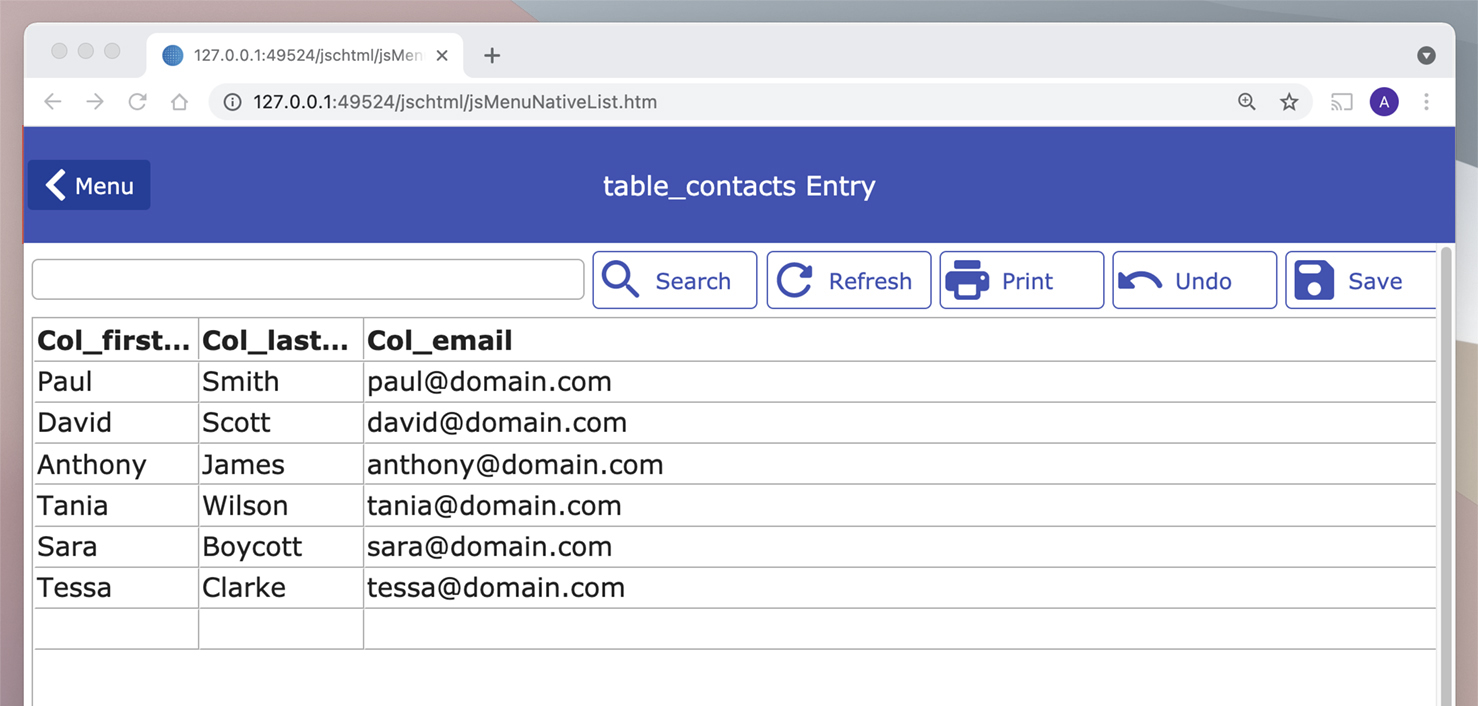
If you add or change any of the data, you need to press Save to keep the updates. You may like to try the Search option: enter ‘Te’ and press Search and you’ll find Tessa. You can click on the column header names to sort the list on that column, either in ascending or descending order using successive clicks. The Print button will create a PDF of your data and display the file in your web browser. Note you can click on Menu and Home in the main Nav bar to get back to the Home screen, or close your browser tab.
Examining your Database Session
Back in the Studio Browser in Omnis Studio, under the SQL Browser option, you can see that Omnis has created a SQLite database from the imported data, then opened a session connected to the database (using the dedicated SQLite DAM) – the library contains code to open the database session automatically. If you drill into the CONTACTSAPPSESSION, click on Tables, then right-click on the table_contacts table (this name will be different if you used your own import file), and select the Show Data option.
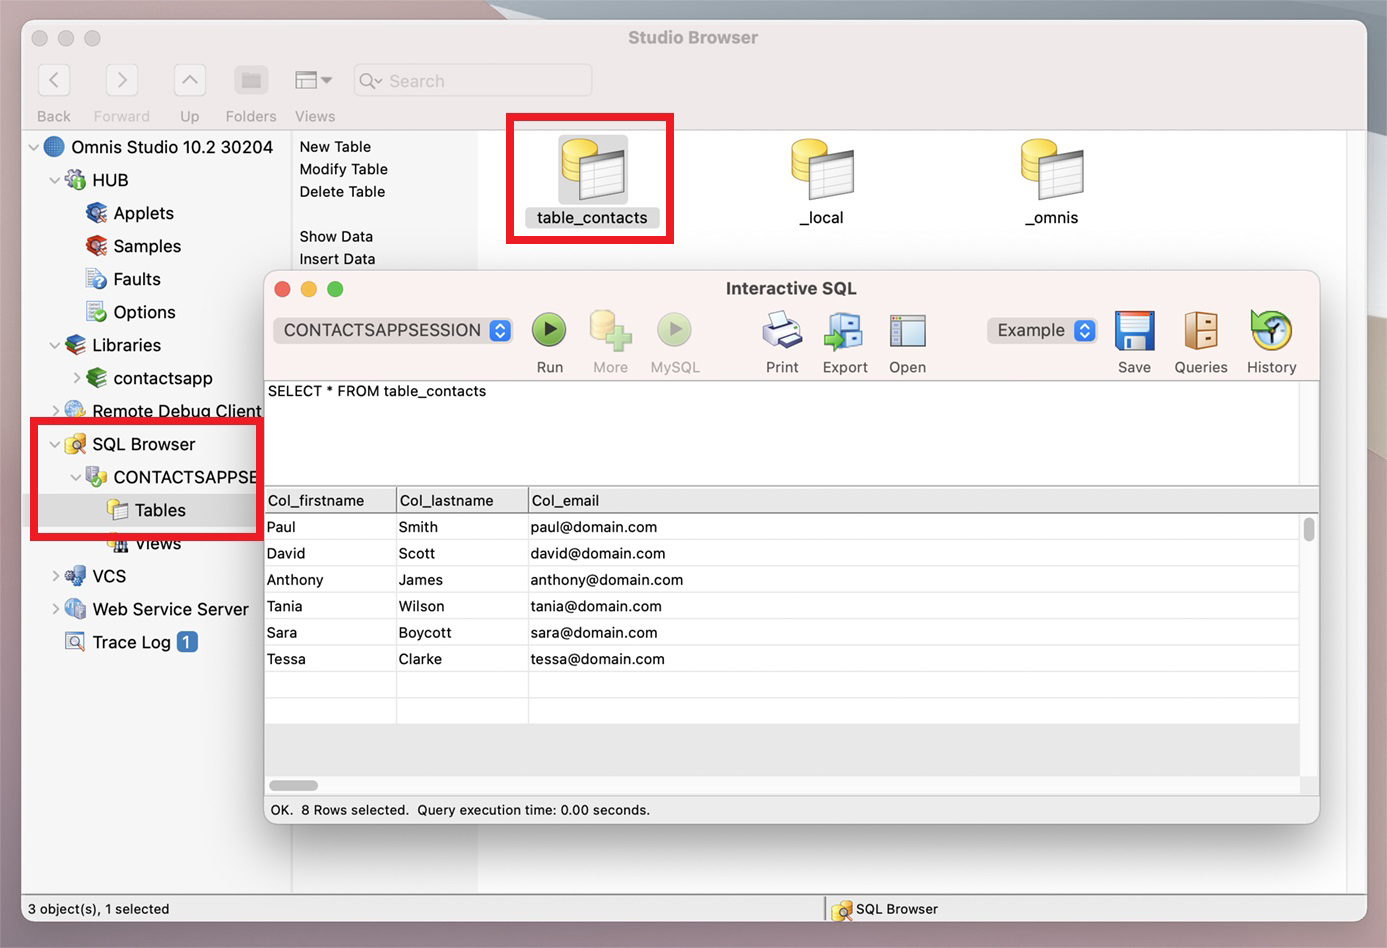
The Interactive SQL window is opened showing the data in your database, in this case, the SQLite database file that Omnis created for you based on the imported contacts file or your own file. You can run your own Query from here to drill down into your data, e.g. you could add a ‘Where’ clause to the SELECT statement (such as WHERE Col_lastname LIKE 'S%' to select all contacts beginning with ‘S’). Close the ISQL window, and go back to the ‘contactsapp’ library under the Libraries option in the Studio Browser.
Looking at the Remote Form in design mode
Next you might like to take a look at the web form (remote form) the Application Builder created for you. Open the JavaScript Forms folder in the Studio Browser, then double-click on the ‘jstable_contactsForm’ remote form to open it in design mode.
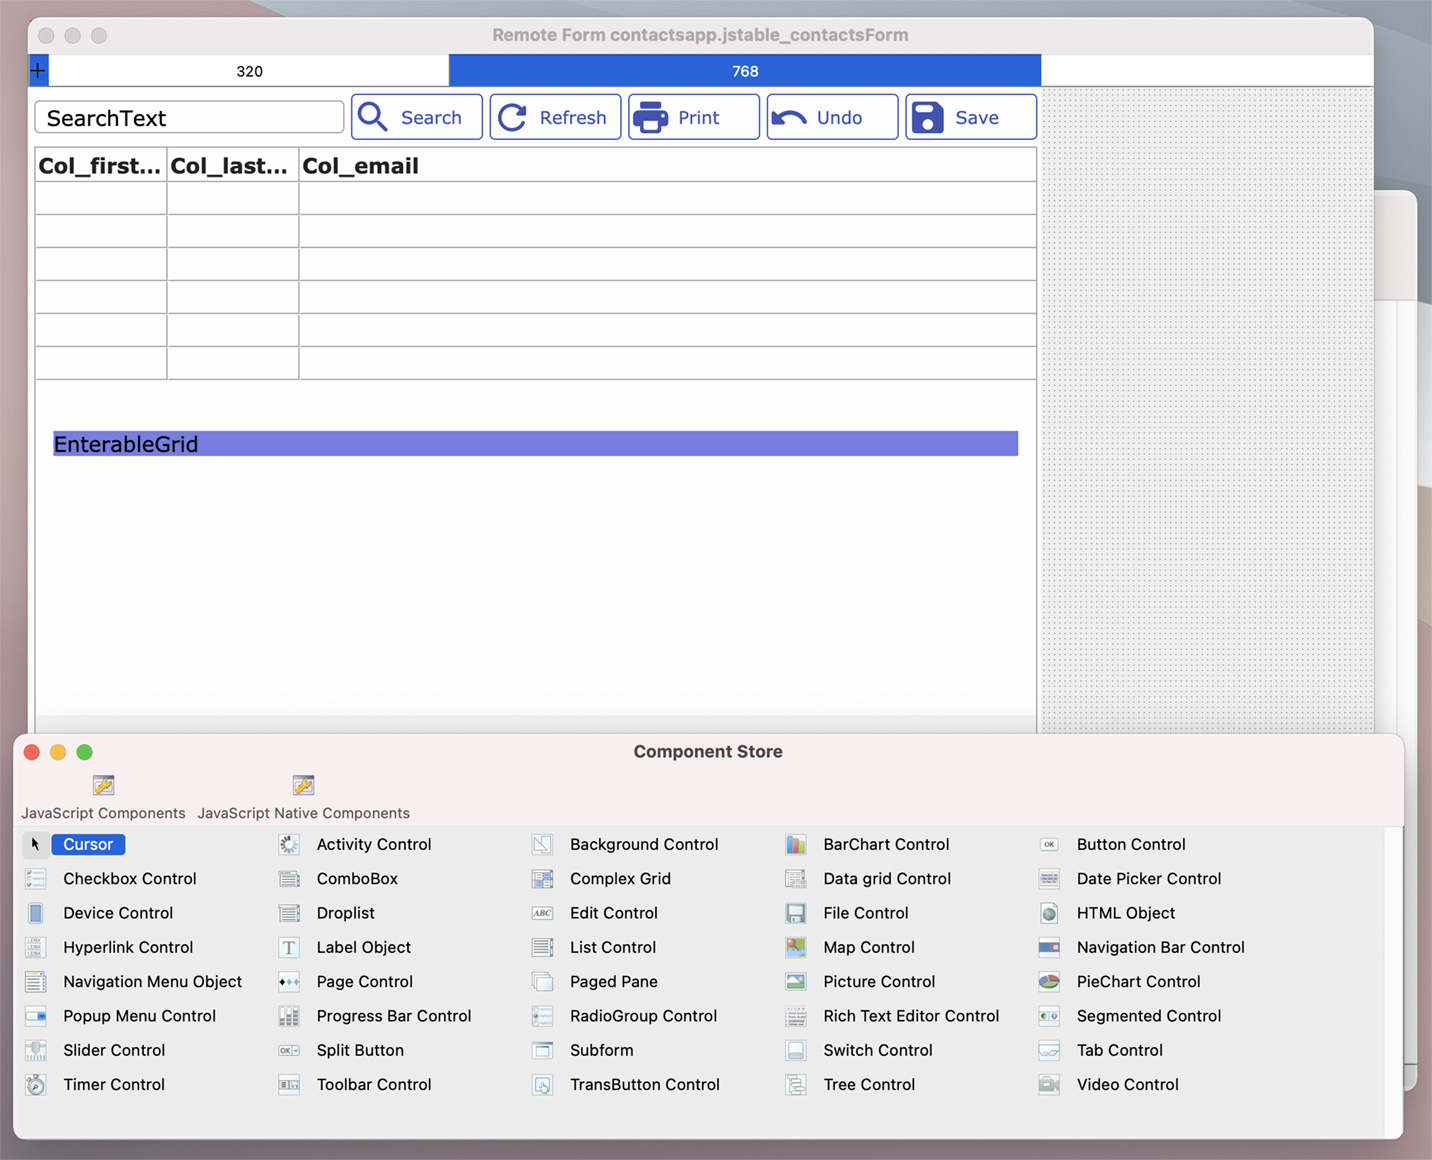
The remote form is opened in design mode in the form editor. You will see the grid containing the columns in your database and the Search and other buttons at the top. The Component Store appears under the form editor which contains over 30 different JavaScript components that you can use in your web and mobile forms in Omnis.
At the top of the remote form design window there are two layout breakpoint markers (the current breakpoint is highighted in blue): 320 for mobile layout, and 768 for tablet or desktop layouts. Click on the 320 breakpoint and you’ll see the same components (data grid and buttons) but arranged for mobile screens. When Omnis runs the form in a browser it will display the appropriate layout for the current device, e.g. a phone will use the 320 layout, or a tablet the 768 layout.
If you want to try out these different layouts in your desktop browser, right-click on the background of the remote form in design mode and select Test Form (or press Ctrl-T). The form will open again in your desktop browser – resize the browser window by making it very narrow and you will see the form switch to the mobile layout (note opening the form in this way does not load the main navigation, which you can do using the Contactsapp menu).
You can view the same form on your phone by following the steps in the online Tutorial: Viewing your form on a mobile device, and substituting the relevant information for the contacts app you just created.
The Application Builder also created a menu, in this case called Contactsapp, which is installed on the Omnis menu bar automatically – this allows you to Test the web form, or open a Desktop form which displays the same SQLite database in a desktop form. Plus you can close the app from the menu.
The contactsapp.zip file contains the same contacts application (library file and SQLite .db file) as described here, as well as the import .CSV file, so if you have any problems you can open and examine this library.
 Facebook
 Github
 Instagram
 Linkedin
 Twitter
 Youtube
 Please logon or create a free account to download this file.
