Tech News Back Issues Issue: 012309
HotPICT ComponentBy David Swain The use of image maps is a long tradition on web sites and in various applications. An image map is an active overlay for an often complex image or collection of text blocks that reacts to click actions just like a pushbutton - or like multiple pushbuttons in a single field. Different active areas are defined within the image map that correspond to different identifiable regions on the underlying image(s) or text. Not every application needs such a field, but they are really helpful when such a need arises! The HotPICT component is, essentially, the overlay part of an image map. That is, it does not contain an image, but it contains a collection of active areas that can react to click events - at least, it does once we've defined those active areas. We place this component on top of one or a number of images or text blocks so that the user will understand its use. The HotPICT field itself is entirely transparent when instantiated. We could think of it as a single control that contains multiple button areas - but these button areas are not necessarily rectangular. The active areas we define within a HotPICT control can, in fact, be polygonal. That is, they can be defined by a number of straight line segments as their borders, but there can be more (or fewer) than four sides to an area, so the junction of any two sides is not required to form a right angle. (The field itself, like all fields on any GUI class in Omnis Studio, is rectangular, though.)
The HotPICT component does not support spline curves like we find in many drawing programs today, so we cannot define curved line segments. We can approximate curved boundaries by using a series of short line segments, but we don't want to get too detailed as this adds more overhead to the component (although, admittedly, that overhead is not huge). The point is that, while we don't have every conceivable tool for drawing the lines bounding an active area of a HotPICT control, we still have a lot of flexibility in the construction of those areas.
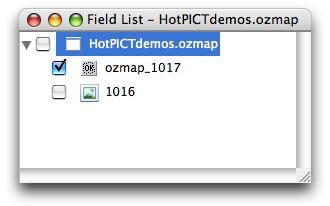
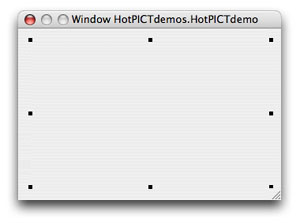
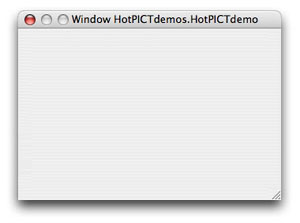
But this discussion may be getting a bit ahead of where the reader is at the moment, so let's start at the beginning... Basics of OperationHere is an overview of basically how we use the HotPICT component before we get into the details of how we set one up. To use a HotPICT object, we must first place one on our window or remote form class from the Component Store. This object is found in the External Components section of the Component Store for either of these class types. The one for Remote Forms should already be active in any Development copy of Omnis Studio, but the Window Class version of the component may very well not be active yet. To activate it, we must set the pre-load status of this component. If you are not familiar with how to do this, I provided a brief discussion in my article on the Hyperlinks Control. After we have placed a HotPICT object onto our Window or Remote Form class, we will immediately notice that there are no "hot areas" on it. That is the default state of this field type. In fact, it will be difficult to even find this field again once we click on another item in that class because the field doesn't even display with a border - so remember where you park it! (Of course, we can always use the Field List window to find any field. If we have not appropriately named our HotPICT field, it still has a distinctive icon - the text "OK" enclosed in an irregular dotted box.)
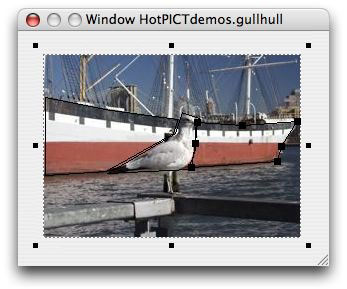
Expansion handles show at the corners and perimeter midpoints of the field when it is selected, but that is all when there are no active areas defined for the image map. So we must add the active areas we require within the field, giving them appropriate names and/or identification numbers and make the proper shapes for their individual purposes.
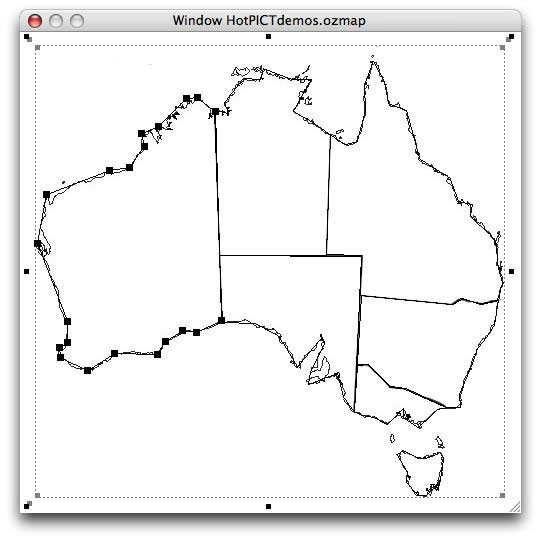
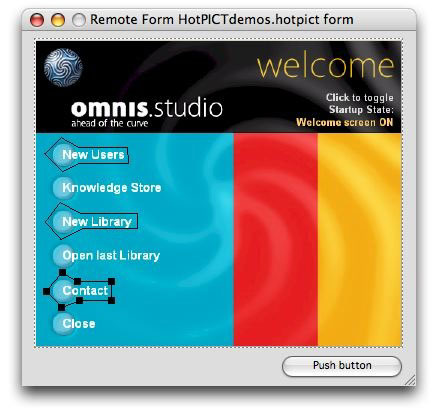
Another helpful tip: the image(s) or other objects with which we want to use our image map should be placed on the window or form first. We then place the HotPICT field over them. We will need those items for reference anyway so that we can trace them with our hot areas. And once we begin creating hot areas, we should make certain that none of those areas overlap each other, since only one of the overlapping areas will receive the evAreaclick event. Details of exactly how to define these areas are given later in this article.
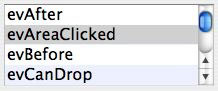
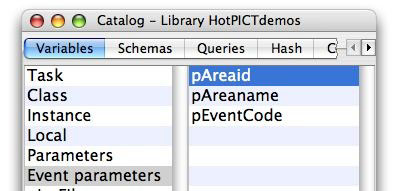
After adding the necessary hot areas to our field, we then switch to the Method Editor and add code to the $event method of the HotPICT object so that Omnis Studio will take appropriate action when one of these areas is clicked at runtime. Since this programming is more familiar to most people reading this article, let's examine how to do this next. Event ManagementThe HotPICT component can react to a number of standard events, but it contains one special event that embodies its primary purpose. This is the evAreaClicked event. This event is accompanied by two event parameters: pAreaid and pAreaname. As their names suggest, these parameters contain the identification number and the name (both of which we get to assign - and neither of which are required to be unique within the field, by the way) of the area that triggered the evAreaClicked event. These are the tools we are given for reacting to this event.
The most typical form of the On evAreaClicked event method block is to use a Switch/Case construct to separately handle clicks on the various areas of the HotPICT object. Here is a simple example of what that might look like:
If we target the areas precisely, there should be no need for the Default option in this code block because we should be aware of each of the possible values for either of the event parameters. Still a little insurance in the early development stages of any project can be useful! As with any Switch/Case block in Omnis Studio, we can trap more than one value with the same Case statement by listing the desired values separated by commas:
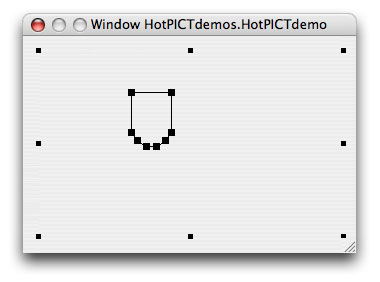
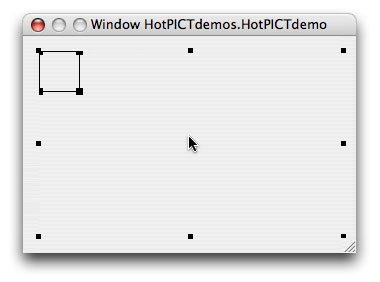
But with a HotPICT field, we can assign the same id or name to more than one hot area within the same field to achieve the same effect. It is not necessary to do that, but it is a viable option. Because of the nature and purpose of this field type, an On evAreaClicked block is usually all that would be required in the $event method of HotPICT field. But there are a number of other events that this field type is also designed to detect. Here is a brief description of some of the more common events - with a few caveats thrown in for good measure: The evAreaClicked event is only reported when one of the hot areas is clicked. A HotPICT field will usually not be completely filled with hot areas, so there are some locations within the field that will not register that click. But in order to detect mouse clicks on the field outside of the hot areas, left and/or right mouse events ($mouseevents and $rmouseevents) must be switched on for the field (or for the library). We are not given the evClick or evDoubleClick events (or their right-click counterparts) for this field type, though, so we must use the evMouseDown, evMouseUp, etc. group of events for this purpose. Furthermore, these events will only be detected if the click or right click happens on an area of the field that is not a hot area. The evAreaClicked event supercedes either a click or a right click on a hot area. (Yes, right clicks on hot areas also report evAreaClicked.) And a double-click can only be detected if a single click is not trapped - that is, evMouseDown and evMouseUp both interrupt an evMouseDouble event if they are trapped in the $event method. And while this field type offers a $contextmenu property, I have not been able to get a context menu to drop or the evOpenContextMenu event to fire for this field type. This is so regardless of the setting of $rmouseevents. A right click on an active area triggers the evAreaClicked event - even if there is no On block in the fields $event method to trap that event (which would make the field pointless anyway!). By the way, these additional events are only options for a HotPICT field on a Window class. Remote Form HotPICT fields only have evBefore and evAfter in addition to evAreaClicked. Well, quite a number of rules in the fine print! But exactly how do we set up hot areas within a HotPICT field then? Hot Area Setup ProcessesOnce we have placed a HotPICT field on a window or remote form class layout, we must add at least one hot area to it. A hot area is a closed polygon defined by a collection of nodes or vertices. In addition, we should adjust the position and shape of each hot area to correspond to the position and shape of some visible element of the window or remote form that lies beneath the HotPICT field. We do this by adding or removing nodes to the original hot area and then moving those nodes around to define the proper shape. We can also move the hot area as a unit, if necessary. We can classify the actions available for defining active areas of a HotPICT control into actions that are used to manipulate areas and actions that are used to manipulated nodes. All operations we perform involving the hot areas we create and their nodes are done using right clicks, so a mouse with at least two buttons is a useful tool here. Macintosh developers using single-button mice can get the same effect by holding down the Control key and clicking. Here is how we begin: To add a hot area to a HotPICT field, simply hold down the Shift key and right-click anywhere on the field where there is not already a hot area. This will place a new default hot area in the upper left corner of the field. This area is a 40-pixel square - that is, it has 4 nodes whose coordinates differ from each other by 40 horizontally and/or 40 vertically.
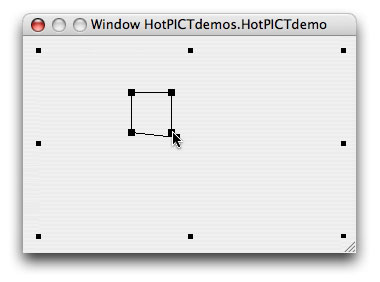
We can drag a hot area to another location by using a right-click-and-drag action.
If we perform the same Shift-right-click action multiple times to create new hot areas, we will have multiple 40-pixel hot areas in the same location (upper left corner). Only one of these areas will be able to accept a click at runtime, so we should move them to positions where they don't overlap. Once we have hot areas in our field, we can select one of those areas by simply right-clicking on it. This makes that the current hot area - more on this later. We cannot select more than one current area at a time. Shift-right-clicking on an existing hot area has the same effect as just right-clicking on it. To my knowledge, there is no direct way to rotate a hot area. Instead, we must move each of its nodes one at a time. To move a node, we simply right-click on the node handle and drag that one node to a new position. We cannot select multiple nodes or click-and-drag a side of the polygon as we can in a drawing program like Illustrator - we can only move an individual node.
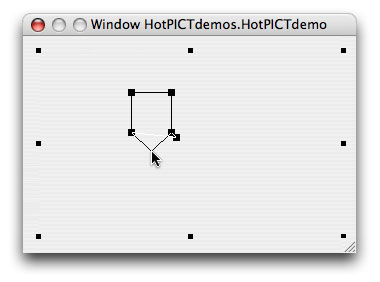
The four nodes of the default polygon are ordered counterclockwise beginning with the upper left node. Nodes can be added to any area and positioned to form more complex shapes. To add a node, we hold down the Shift key and right-click on an existing node. A new node is then added just before the one on which we clicked in node number order and 5 pixels below and to the right of that node.
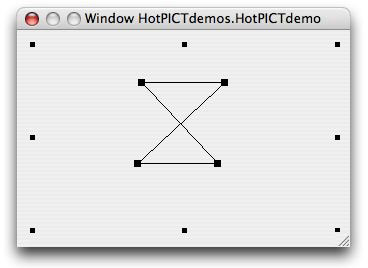
Hot areas and nodes can also be removed if we have gotten too carried away. To remove a hot area or a node, hold down the Command (Mac) or Control (other OS) key and right click on the item. The Undo command in the Edit menu has no effect on operations we perform on a HotPICT fields hot areas. We cannot undo any of the operations I have described here. The closest we can come to this is to Save the window or remote form after each successful and desired change and then Revert the window or remote form to undo any operation(s) since the last Save. (I am only the messenger...) The order of the nodes is important (as we will learn in the next article!). If we move the wrong one into the wrong position, we could find that our hot area has wrapped around itself and no longer bounds the area we thought it should. So be careful not to cross the bounding lines - unless the resulting area is what you want to achieve:
Here is a summary of the area and node operations detailed above:
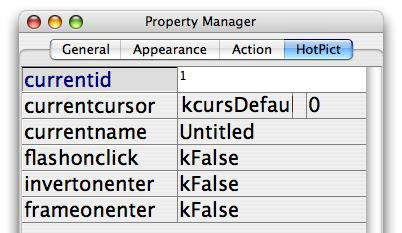
Overall Field PropertiesA HotPICT field has the same basic properties as any normal field. Height, width, top, left and the others work as expected. Since the field is generally invisible (well, transparent), there are few Appearance properties - and no Text properties since it does not display text. The one overall field property we want to be careful with is designactive. This property is set to kTrue by default, so we might not notice it. But it must be set to kTrue for us to be able to create and manipulate hot areas - or to even select the field by clicking on it, for that matter. If the designactive property gets set to kFalse somehow (which does have the advantage of not allowing the field to be accidentally moved - important once we've aligned it with the underlying picture or text), we must use the Field List window to select the field and then we can reset that property to kTrue. Hot Area OptionsBut the properties we are most concerned with are the ones under the "HotPict" tab. These are the properties of the current hot area - the one that is currently selected. It is important to note that we must select that area using the mouse (with a right-click). We cannot change the current area by typing its id number into the appropriate field in the Property Manager, as we can with the columns of a Data Grid or some of our other field types. Typing a number into that property's entry field simply assigns a new value to that property of the current hot area.
Here is a brief description of each of the properties of the current hot area: currentidEach new hot area is assigned an id number by default. When first created, it is given an integer value for this property that is the current number of hot areas in the field - including itself. So if we do nothing else, our hot areas are numbered sequentially beginning with 1. But we can override this with our own id numbers if we wish. Perhaps the number we use has special meaning within the context of our data or our application. This also allows us to give the same id number to more than one area, if that makes sense for our purpose. For example, a foreground object in our graphic might split the image of a background object. If we want to avoid the problems associated with overlapping hot areas, we could use two hot areas for the background object and give those two the same id and name values. Or we might have a map of a chain of islands and choose to make hot areas only for the islands and not for the intervening water area, yet treat the islands as one item (Hawai'i, for example) rather than treating them as separately named things (Oahu, Maui, etc.).
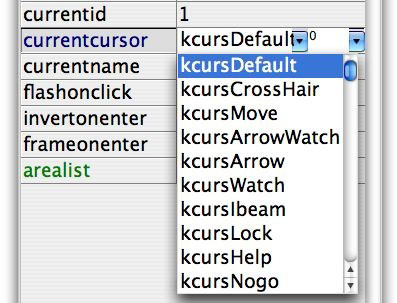
But we would have the flexibility to give them the same id value, yet different names. Plenty of choices here! currentnameThis is another way to identify a hot area. Just like our fields have ident and name properties, hot areas have this property in addition to currentid. When a hot area is first introduced to a HotPICT field, its currentname property is assigned a value of "Untitled". So if we want to use this property (and the event parameter that it populates) in any meaningful way, we must assign it a more appropriate value. Again, the area names do not have to be unique within a given field (which we could figure out by the fact that they would all be "Untitled" if we simply left the names at their default values). As in the example above, we could assign the same name to each of the parts of the overlay for the background object in the picture as well as giving them the same id value. currentcursorThis is the id number or named constant of a cursor icon we want to appear when the cursor passes into the boundaries of the area. We use this to give an indication to the user that the area is clickable as the mouse pointer passes over the HotPICT field. We have two choices of how to specify the cursor for a hot area. The first is to select the name constant for a built-in cursor, which we can do from the dropdown list that appears:
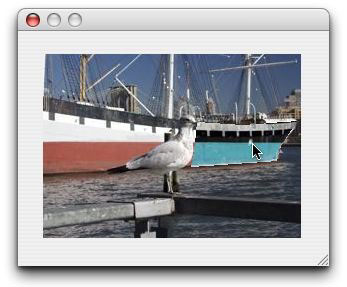
The second choice is to supply the number of a cursor icon. When we click on this item, the icon selector window appears. This gives us even more flexibility because we can also access custom icons we have placed in either the #ICONS system table or in our own custom icon datafile. invertonenterAnother way to indicate to the user that an area is clickable is to invert that area when the mouse pointer passes over it. This inverts any color of the image or text covered by that area:
frameonenterStill another way to indicate clickability is to show the border of the area when the mouse crosses into its boundaries:
This looks better for some hot areas than for others, but it gives a visual cue to the user, which is the important thing. flashonclickAnd finally, we can give another visual cue to the user that their click has been acknowledged by setting the hot area to flash briefly when it is clicked upon. This property might only apply to certain operating systems, though. So we have plenty of options for creating interesting interfaces and visually informing the user of the choices they can make with our image maps. But there is more to this field than what we've explored so far... In the Next IssueIn this article, we examined the basic setup and operation of a HotPICT field. We also explored a few simple examples of its use. In the next issue, we will look at how we can give our users more control over a HotPICT field at runtime and how we can make dynamic modifications to such a field. Lots of possibilities!
| |||||||||||||||||||||||||||||||||||||||||||||||||||||||||||||||||
| ©
2009 Omnis Software. Copyright of the text and images herein
remains with the respective author. No part of this newsletter may
be reproduced, transmitted, stored in a retrieval system or translated
into any language in any form by any means without the written permission
of the author or Omnis Software. |
|||||||||||||||||||||||||||||||||||||||||||||||||||||||||||||||||


 Please logon or create a free account to download this file.
