Tech News Back Issues Issue: 051403
|
Introduction to the Omnis Web Client: Part 14, Ultra-thin client content generator By Dr Caroline Wilkins Having looked at ultra-thin login techniques over the last few technical newsletters, I thought we might like to take a break and look at an application of the Omnis ultra-thin (HTML) interface. Anyone who has spent a reasonable amount of time on the web will have come across random/rotational/targetted content generators. These typically take the form of banner adverts or may be used to generate dynamic content such as "Joke of the day", news headlines and stock quotes. The object of this tech news article is to build a content generator using the Omnis ultra-thin interface that is easy for other people to use within their own web sites to serve content from their server. Clearly, there are many ways to approach this and the technique we will use is just one of many that might be equally suitable. The example we are going to take (mainly because I have a genuine need to build this for the RescuePet system!) is that of a "Featured Pet" generator which RescuePet supporters can easily integrate into their own sites. In order to get it widely adopted, it must be very easy for the 3rd parties to use (ideally just one line of HTML), so that is what we will aim for. This strategy can be a very effective form of viral marketing and has applications across many industries. We will just aim to serve a small advert with a picture of a dog. It is, of course, entirely possible to extend the technique to create more targetted and strategic content, such as adverts etc. 1. The 3rd party interface <HTML> 1.2 Ensure that you have Omnisapi.dll in your scripts directory (e.g. C:\Inetpub\wwwroot\scripts or C:\inetpub\scripts) or nph-omniscgi in your cgi-bin if you are on linux. Ensure that the script is configured to execute for all users. That's all you have to do for the 3rd party interface. The script section is basically a one-liner that they can put anywhere within their own web page. From there on, it is up to you to create the content within Omnis. Note that the script makes a call to OmnisClass=rtFeature. This is a new remote task that we must create in the demo library. 2. The Webserver interface document.write('<TABLE>'); 2.2 Create a new remote form called rtFeature in the demo library that
we have been using in previous tech newsletter exercises. (You can download
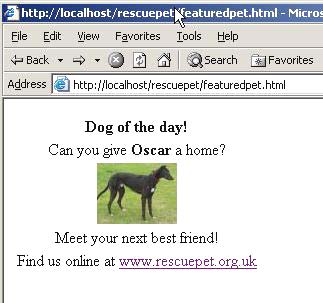
it from RPLogon5.zip - libraries and datafiles may need to be converted in Omnis). ; Read template HTML from file (Note that this is the same as the first 5 lines of the createHTML method in rtLogon, which we created in the previous newsletter. We could put this method into a super class at this point and it would be sensible programming practise to do so. However, I don't want to get distracted from the objective of this short tutorial, so we will do this the inelegant way for now.) 2.4 Create a new method within rtFetaure called respondToUser and enter the following code: Calculate lHtmlLength as len(iHtml) Note that this is identical to the method of the same name on rtLogon, so you can copy and paste. The same applies to this method as to the createHTML method above with regards to the superclass. 2.5 Tie this together in the $construct method of rtFeature by entering the following code: Do method createHTML 3. Testing... You should now be able to open up the html page you created in stage 1 above e.g. Http://localhost/rescuepet/featuredpet.html. This will make a call to the remote task rtFeature within Omnis. Place a breakpoint in the $construct of rtFeature and ensure that the call is making it from the html test page (featuredpet.html). Step through the code and make sure that the createHTML method is locating and opening the template file, featuretemplate.html. If all has gone to plan, you should find that a small advert with a picture of a dog is loaded into your html page, as in the picture:
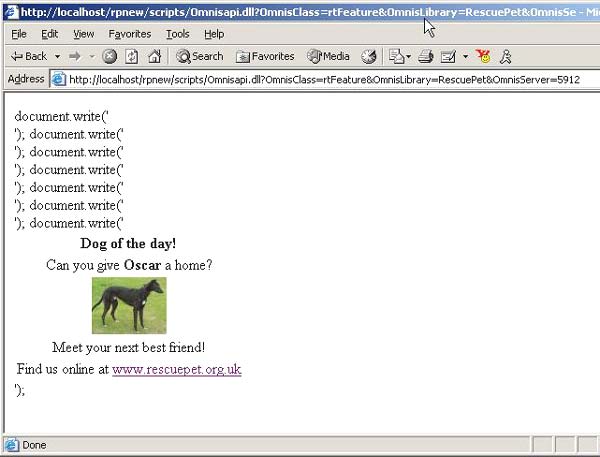
You can take a step up the chain of events by entering the URL that your script calls directly into the address bar i.e. http://localhost/rpnew/scripts/Omnisapi.dll?OmnisClass=rtFeature&OmnisLibrary=RescuePet&OmnisServer=5912
Whilst this looks a little alarming, this is exactly what you should hope to see. Examine the source and you will see the javascript that you entered into the template file earlier. When this content is fed to the script in the test page, the browser interprets the javascript and displays the data as desired. What we have achieved in this tutorial is just the dynamic generation of an advert from a single line of 3rd party html. This illustrates a technique, but in practise we would want to make this a lot more sophisticated. In this case, we would want to randomly select a dog from the database, perhaps restricting the dog to a particular breed, shelter or geographic location. We could also allow our 3rd party users to specify formatting details such as background and text colour, which we could then use to dynamically customise content for them. This would enable the 3rd party users to integrate our dynamic content into the design of their site with more flexibility for design. If we are serving commercial advertisements using this method, we might want to be adding code to record requests for the content so we can keep account of what adverts have been served to what IP and when. The possibilities are endless and this technique can easily be extended to accommodate them. You can download the demo code, with the html files from RPfeature6.zip (libraries and datafiles may need to be converted in Omnis). A "Dog of the day" generator will soon be operating on the RescuePet web site. If any readers would like to add the generator to their own websites, the author would be delighted... :)
Installing MenusBy David Swain In the last issue of Omnis Tech News we reviewed some basic information about Menu Classes in Omnis Studio. For the next few issues we will explore the various ways that Menu Instances can be used and how we set them up at the class level for various purposes and "installation" techniques. We begin in this issue by examining "installed" menus. These are menus that are instantiated in a standard way and then wait for someone to use them. These instances are relatively "static", although we can certainly add some "dynamic" features to them. The Main Menu BarA standard feature of most GUI applications on any platform (including Omnis Studio) is a "menu bar" across the top of the monitor space (or application window). This is often referred to as the menu bar, but we will call it the main menu bar here. This is to distinguish it from the menu bars we can activate on windows within an Omnis Studio application (the subject of a future article). The main menu bar is the primary location for navigation tools in most applications. These are commands that open and close windows and tool palettes, print "reports" and toggle application settings. This does not just apply to database applications we create using Omnis Studio. It is equally relavant to nearly any program we might name, commercial or custom built. The use of this feature is so prevalent that standards have evolved so that users who become familiar with one program that uses menus will automatically be comfortable using this feature in any other program that subscribes to the same standards. Some of these standards are so strictly enforced in Omnis Studio and elsewhere that we don't give them a second thought. For example, menu lines are always horizontal and the text of the line is always on the left with any keyboard shortcut indicated on the right. We don't have any control over the fonts used or the spacing between the lines. It is great that we don't have to deal with such trivia and that our menus will look "correct" with regard to these "properties" with no effort on our part! But Omnis Studio gives us some latitude in other areas - and there are things we must be responsible for that it couldn't possibly handle for us. Spelling is only one of these... Basic Installed Menu FeaturesThe features of menus installed on the main menu bar that are common across all platforms are these: First, such a menu has a title and one or more menu lines. Each menu line (other than "separator" lines) has descriptive text, an optional shortcut key combination and a method that it invokes. A menu line can also be active or inactive and checked or unchecked. An inactive menu line is "greyed out". An entire menu can also be made inactive, at which time even its title is "greyed out". The menu title identifies the menu, giving some indication as to what kind of commands it contains. It is the programmer's responsibility to title a menu appropriately. The title of an installed menu also acts as the activation point for that menu's use. This is automatic... Menu lines are the action points of the menu. In a way, using a menu is like using a pushbutton - at least as far as mouse operations are concerned. The mouse must be pressed down on a pushbutton to "activate" it. Then if a subsequent "mouse up" action occurs to the same pushbutton, the "action" of clicking the pushbutton is fulfilled and the event handling method of that pushbutton is invoked. A "mouse down" on a menu "activates" it, but this also displays the options for that menu which appear as a sort of "list". We can think of this as a collection of "pushbuttons", one of which we use to trigger an event handlling method by a "mouse up" action over its area. This similarity is even more pronounced if we use the "sticky menu" technique where a click on the menu title (instead of holding the mouse button down while "dragging" to a menu line) opens the menu and a second click on a line of that menu invokes the event handling method. All this is handled automatically by Omnis Studio. The menu line text indicates what action will result from selecting that line. Again, the programmer controls and is responsibile for the text of the menu line. A line without text becomes a "separator" line and cannot be selected at runtime.We can assign various text styles to this text on most platforms using the fontstyle property for the line ("styled" text as discussed in recent articles is not supported here), but Mac OS X enforces its own strict interface rules in this regard and appears to ignore text style settings. A menu line can optionally provide a shortcut key that can also be used to invoke the event handling method for that line at runtime. This keystroke combination is displayed on the righthand end of the menu line if a shortcut is declared for the platform on which the library is running. We cannot assign a shortcut key to a "separator" line (one with no text). Title "Visibility"I have occasionally heard Omnis developers request the ability to assign shortcut keys that are not represented by an installed menu line. An interface guru would probably say that "hiding" a menu or menu line is "unfair" to the user. If we want to offer a shortcut key, then we should put this in a place from which the user can learn the shortcut and where the user can select the command with the mouse while still learning that shortcut. Since Omnis Studio (appropriately) only allows us to assign shortcut keys to menu lines, a programmer might attempt to make such a line "invisible" to provide such a "hidden" shortcut. Here is the trouble one can get into in such attempts. (Yes, I know we can track key events to emulate this, but please follow along...) We cannot make the menu title or a menu line invisible like we can with the components of a window. There is no visible property for either of these items. If we do not assign any text to the title property of a menu and we then install it, the title of that menu will appear as "???" on any supported platform. We can assign a non-printing character to a menu title using square bracket notation ("[chr(0)]", for example), but the menu will still leave a noticeable "track" or gap on the menu bar because of the automatic spacing between menus that Omnis Studio provides (sort of like the "invisible man" in fog or smoke). Such a menu will still be selectable by the user and may become "visible" on some platforms as the mouse passes over the area where the title would normally appear. Certain "non-printable" ASCII characters (those with a decimal ASCII value less than 32) actually do display an image in a menu title. This is one of those areas where Macintosh people can have a bit more fun than Windows people. On Windows (only tested on Windows 2000 server, by the way), most of these ASCII values result in the appearance of an empty rectangle. Only values 0, 8, 9, 31 and 32 appear "invisible". Value 31 displays an "underscore" character. Macintosh OS9 displays the widest variety of symbols, which I present in the table below. Only values 0, 8, 9, 13 and 32 (the "space" character) appear "invisible" on this platform. Values not otherwise mentioned display a rectangle like the one we see on the Windows platform.
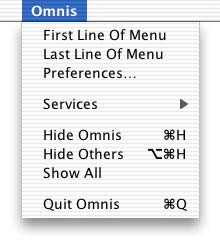
Macintosh OS X is less varied, but has an interesting twist. Most of these ASCII character values display nothing when used as a menu title. Values 17, 18 and 19 display the same symbols as their Mac OS9 counterparts. But if we attempt to use ASCII 20, an interesting thing happens: The installed menu takes on the title "Omnis" and all the lines from the "normal" Omnis menu (except the "About Omnis Studio..." line) are moved to the bottom of this menu. By "moved" I mean that they no longer appear in the "original" Omnis menu. I see no practical value for this (and the Apple Interface Police will not look kindly on its use!), but i thought you should know...
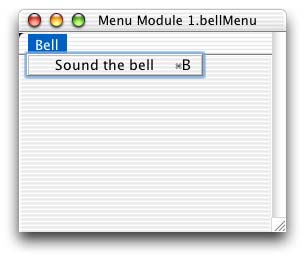
"Escaping" the value of 20 (using "[chr(27,20)]") places a "flat", black Apple symbol in the menu title (rather than the "3 dimensional" color one for OS9). Line "Visibility"Attempting the same trick to make a menu line "invisible" can have more serious consequences. A line without text is a "separator" line and Omnis Studio does not allow us to assign a shortcut key to such a line. If we try to make this line "invisible" by assigning a "non-printing" ASCII character using square bracket notation as with titles above causes major problems! First, these symbols do not appear on any platform. A line whose text is solely one of these characters is not even a separator. The line is totally invisible! However...lines below it in the menu "roll up" to fill in the space. In this process, they take on the $event method of the line that was designed to be above them. So suppressing the "visibility" of a line in this way actually shifts the "visible" lines of the menu instance to the methods of the line above it. This is not good! But it's our own fault for trying to do something that goes against good sense in the first place... Quick Test MenuLet's build a simple menu class that we can use to test various installation techniques. We'll give it a title and a single line that has a shortcut key assigned to it. For even more simplicity, we'll just have that line "Sound the bell" with its event handling method. Create a new menu class and assign "Bell" (without the quotes) to its title. Name the menu "bellMenu" (also without the quotes). Create a single menu line with the text "Sound the bell" and assign it a shortcut key of Cmnd/Ctrl-B. In the $event method for this line, place the "Sound bell" command. Here is the step-by-step:
Now let's practice installing this menu. "Install Menu" CommandThe simplest way to install a menu on the main menu bar is to use the Install menu method command. This command requires the name of a menu class as its first parameter. The command expects this to be entered as a string, so we can use an expression in square brackets to derive this value if we need to. We can optionally assign a name to the resulting menu instance and send a list of parameters to its $construct method. The name of the menu class to be instantiated and the name to be assigned to the instance are separated using a "/" character while the optional list of constructor parameters is enclosed in parentheses. The assignment of the instance name is handled in one of three ways: If we do not specify anything for the instance name (whether we include the "/" character or not), it is assigned the same "simple" name as the class from which it is spawned. This prevents the same menu class from being installed more than once on the main menu bar since it full notational pathname must be unique. (We will see next time that this does not prevent us from installing the same menu with the same "simple" name on multiple window instances because they have different paths.)
The second way we can name the instance is to do so explicitly following that "/" character. (Remember to not include quotes around this name or they will end up as part of the name!) Again, if we attempt to assign this name to a new instance when an instance with that name already exists on the main menu bar, the additional one will be disallowed.
The final way we can assign the instance name is to let Omnis Studio name it for us. We do this by placing the "*" character (without the quotes!) after the "/" character. Omnis Studio creates a name that begins with the class name, but is followed by an underscore character and a randomly selected integer. Executing this command (configured this way) multiple times will result in multiple instances of the menu class being installed on the main menu bar.
The menu instance installed in this way is added to the right end of the custom instances on the main menu bar. We have no control over its location using this command. If we need to send parameters to the $construct method of the menu instance, we can do so by enclosing them in parentheses following the "parameters" of the Install menu command mentioned here. Each item in this comma-delimited list of constructor parameters is treated as an expression, so explicit strings must be enclosed in quotes. We will deal with the $construct method and the passing of parameters to it in the next article. The $open() MethodWe can also use Omnis Studio Notation to install a menu instance on the main menu bar. The $open() and $openonce() methods of menu class allow us to do this. There is a subtle difference between these two methods. Neither one allows two instances of the same name to exist in the same place. The $openonce() method does not even allow instances of the same class with different names to exist in the same place. It tests to see whether the menu class already has an installed instance and then creates one if none currently exists. $open() attempts to create an instance with a name as specified (or implied) by its parameters, but refuses to create the instance if an instance of that name already exists. We have the same three naming options as with the Install menu command:
Note that we must always specify the notational path to the class when using these notational methods while the "Install menu" command assumes that the menu class belongs to the library from which the executing method was originally derived. The menu class name must be qualified by the name of its library only if that is different from the library from which the executing method originated. Also notice that we must enclose any string parameters in quotes, since parameters of a notational method are assumed to be expressions rather than strings. Square bracket notation is therefore neither necessary nor allowed. In addition to specifying the name of our menu instance for the main menu bar, we can also specify the location of this menu instance within the others already on the menu bar with a second parameter. This parameter value will be treated as an integer. Menu locations begin with "1". Specifying a location less than or equal to zero or greater than the number of custom menus already on the menu bar will have the same effect as not specifying a location at all. If our new menu instance is inserted before other menus, all menus that follow it move to the right. So if there are already two custom menus on the main menu bar, we can put our new menu in the second position like this:
The menu that was in the second position now moves to the third position. The $open() and $openonce() methods both return a notational reference to the menu instance created. We can capture this information for future use by placing an Item reference variable of appropriate scope in the Returns value of the Do command.
We can then use this to perform other operations on or with this menu instance. This is especially useful if we allow Omnis Studio to assign the instance name for us. Additional parameters past the two already mentioned are received as parameters of the $construct method of the menu instance. In order to send The $imenus.$add() MethodWe can also install a menu instance by adding it to the group of menu instances. This operation is then performed on that group rather than on the menu class. This means that we must specify both the name of the menu class and a technique for naming the instance as well as an optional location within the group as parameters of the $add() method. As with the $open() method for a menu class, this method does not allow duplicate menu names on the main menu bar. We have the three naming options as before. If we wish to specify a location, but want to use the class name as the instance name, we just use the "empty string" designation (a pair of quotes with nothing in between) for the second parameter. So to add an instance of our menu with a specified name to position number "2" on the main menu bar, we would issue this command:
Again, we can specify further parameters that will be received by the $construct method of our menu instance. Only the first parameter of the $add() method is required, but all parameters out to the last one specified must be included. Numeric parameters can be left completely empty (nothing between the commas), but string parameters must include at least the quotes (if nothing else). In Closing...Next time we will examine how we can use and interact with menu instances on the main menu bar from a programming standpoint.
|
|||||||||||||||||||||||||||||||||||||||||||||
| © 2002-2003 Copyright
of the text and images herein remains with the respective author. No part
of this newsletter may be reproduced, transmitted, stored in a retrieval
system or translated into any language in any form by any means without
the written permission of the author or Omnis Software. Omnis® and Omnis Studio® are registered trademarks, and Omnis 7™ is a trademark of Omnis Software Ltd. Other products mentioned are trademarks or registered trademarks of their corporations. All rights reserved. |
|||||||||||||||||||||||||||||||||||||||||||||


 Please logon or create a free account to download this file.
