Tech News Back Issues Issue: 052803
|
Introduction to the Omnis Web Client: Part 15, Ultra-thin client: HTML form input from client By Dr Caroline Wilkins Whereas the Omnis thin webclient offers a range of components that enables the developer to create a rich interactive interface, the ultra-thin client interface is somewhat restricted to HTML FORM elements. This article will explain the use of HTML forms and the form elements available to the developer. 1. Structure The general structure of an HTML form is illustrated in the following login example: <FORM method="GET" action="http://localhost/scripts/Omnisapi.dll"> <TABLE> Note that, in the FORM tag, you can use method="GET" or method="PUT". If you use "GET", the values of the form variables will be visible in the address bar, appended to the URL, when the new page is returned. If you use "PUT", they will not be visible. Instead they are sent as part of the HTTP request message body. This is clearly preferable for applications where form data should be kept secure e.g. Logon forms. The action parameter within the FORM tag specifies where the form data should be sent. In this example, we are sending the data to the Omnisapi.dll script, but the same approach applies for sending data from an html form to an asp or php page or a cgi script. 2. Hidden parameters e.g. <INPUT TYPE="hidden" NAME="OmnisClass" VALUE="rtLogon"> Hidden parameters are used to pass data to a script without displaying the data to the user. We use them in the Omnis ultra-thin interface to specify the remote task, Omnis library and internal port number that Omnis is using. This enables the Omnisapi.dll to send the HTML form data to the correct remote task. 3. Text box e.g. <INPUT TYPE="text" NAME="Username" VALUE="testuser" MAXLENGTH="20" SIZE="30">
The text box accepts a string input from the user, in the form of a single-line entry box. The default value can be specified in the VALUE parameter. The width of the display box is specified in the SIZE parameter and the maximum length of the input string is specified in the MAXLENGTH parameter. 4. Password e.g. <INPUT TYPE="password" NAME="Password" VALUE="testpass" MAXLENGTH="20" SIZE="30">
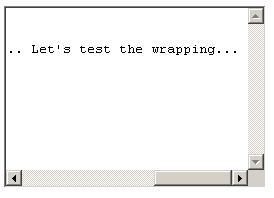
The password input type is very similar to the text input. The difference is that the text typed in (or displayed as default) is obscured by asterisks. 5. Text area e.g. <TEXTAREA NAME="Description" ROWS="10"
COLS="30" WRAP="OFF">
The text area presents the user with a multi-line entry box. The width of the box, in characters, is set in the COLS parameter and the height of the box, in lines, is set in the ROWS parameter. The box will have horizontal scroll bars if you include WRAP="OFF". If you omit it, or use the other potential values (WRAP="VIRTUAL" or WRAP="PHYSICAL"), then there is no horizontal scrolling and the text is wrapped within the box. WRAP="VIRTUAL" will introduce space characters to facilitate wrapping, but these will not be sent to the server as part of the text string. They will be sent if WRAP="PHYSICAL" is used, however. 6. Radio group e.g. Male <input type="radio" name="Gender"
value="Male" CHECKED>
The radio group is suitable for mutually exclusive options. The elements of the radio group are grouped together by the NAME parameter. If the NAME parameter is different, then the radio buttons belong to different radio groups. In the example above, both the radio buttons belong to the "Gender" group. The default value may be set by adding CHECKED within the input tag. 7. Check box e.g. <input type="checkbox" name="Consent"
value="Newsletter" CHECKED>Newsletter
The check box is a Boolean input device. It's default value is off, but this may be defaulted to on by adding CHECKED to the input tag. When the form is submitted, only name/value pair for checkboxes with on are sent. Checkboxes may have different names, or you may use a group with the same name. Either way, the data is sent to the target as name/value pairs if the checkbox is on. If you have given a cluster of checkboxes the same name, as in the example, the target will receive a cluster of parameters with the same name, but different values. 8. Select box e.g. <select name="county"> <select name="county" MULTIPLE SIZE=5>
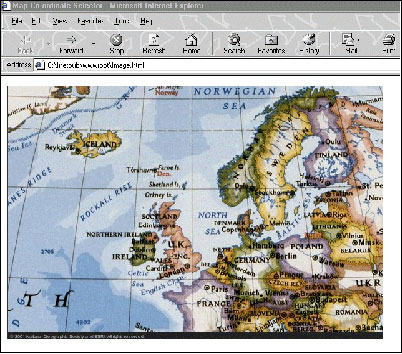
The select box can appear as either a single-line drop list or multi-line select box, with the height/number of lines displayed in the box determined by the SIZE parameter. The select box can allow only a single selection or multiple selections to be made. This is controlled by the presence of MULTIPLE in the select tag. Note that, if MULTIPLE is present, then the browser will default the SIZE to a value greater than 1, so that multiple selections are possible. A value may be selected by default by adding SELECTED to the option tag. 9. Image input e.g. <INPUT TYPE="image" SRC="http://localhost/images/EuroMap.jpg" NAME="Map">
The image input type displays an in line image, whose source URL is specified in the SRC parameter. Clicking on the image will cause the form data to be submitted (just like clicking on a submit button). The co-ordinate within the image that the user clicked on will be passed to the form target as two name/value pairs, with .x and .y appended to the value of the NAME parameter. In the example above, this might be Map.x=50, Map.y=100. You could use the image input element to obtain a map co-ordinate, as in the example, or simply to create an attractive submit button (and effectively discard the co-ordinate information). 10. Submit e.g. <INPUT TYPE="submit" NAME="Send" VALUE="Send form data">
Unless you use the image input, your HTML form will need a submit button. When the user clicks the submit button, the form data is sent to the target specified in the action parameter of the FORM tag. It is possible to have multiple submit buttons within a FORM, each with different name/value attributes. In which case, only the name/value pair associated with the submit button that has been clicked will be sent. The value of a submit button is not editable by the client (unless they edit the source!). 11. Reset e.g. <INPUT TYPE="reset" VALUE="Reset the form">
A reset button can be used to restore the form to it's default values and selections. The text displayed within the reset button may be configured in the VALUE parameter. If this is not specified, then the browser will default the text to "Reset". The reset occurs on the client and no data is sent to the server when the reset button is clicked. No name/value pair associated with a reset button is sent to the server when the FORM is submitted. Putting the form elements together, you can design an input form of varying complexity and obtain data from a user in a range of ways. The elements of the HTML form are all that the web designer has at his disposal when retrieving data and user input, unless he employs a plug-in technology such as Flash, ActiveX or Omnis webclient. You will see HTML forms used widely throughout the web, with asp, php, cgi as well as Omnis ultra-thin interface. In future newsletters, we will look at using HTML forms to send data to an Omnis web server, via the Omnisapi.dll or nph-omniscgi scripts. You can download an html file with the examples of form elements discussed in this article from: htmlform.zip (libraries and datafiles may need to be converted in Omnis).
Installed Menus - Installation OrderBy David Swain In the last two issues of Omnis Tech News, we examined basic information about menus and the different ways we can install menu instances on the main menu bar of Omnis Studio. In this issue we will continue this exploration by detailing how Omnis Studio interprets the "order of installation" of menu instances on the main menu bar. Let's begin with a clarification of and expansion on assigning menu positions using the $open() method for a menu class or the $add() method for the $imenus group... The $imenus Group Menu instances installed on the main menu bar become members of the $imenus group. This group is contained directly inside $root, so it is global to our Omnis Studio session. Members of this group are therefore easily and globally accessible throughout an application no matter how many task instances are open and no matter how many libraries are used to house their class definitions. That is, they need not be referenced through the task instance that contains them nor through the library that contains their class information. Members of $imenus have certain properties that help us work with them more effectively. For this article we are interested in the fact that installed menus have an order property that determines where along the menu bar they are shown relative to the other menus installed there. This property also determines how we access them using certain methods associated with the $imenus group itself. For example, if we use the $makelist() method of the $imenus group to generate a list of all the menu instances installed on the main menu bar, the order property determines the order of the list lines generated. Information about the leftmost custom menu will be placed in the first line of this list with all other installed menus added in left-to-right order. The order property does not necessarily correspond with the order in which menu instances are added to the menu bar however... Order of Installation Last time I pointed out that we can instantiate menus that will be installed on the main Omnis Studio menu bar by using a number of techniques. Two of those (<menuclass>.$open() and $imenus.$add()) allow us to specify a "position" for the menu - the order property value for the menu instance within the $imenus group. I focused on assigning an explicit integer value for this parameter to demonstrate that we can insert a new menu instance between other pre-existing menu instances. This property determines the order in which menu instances are displayed on the menu bar, in the Notation Inspector (under $imenus) and using the $makelist() method for the $imenus group. But there are also constants we can employ for assigning a value for this parameter that open up possibilities I didn't mention before. There are four such Menu position constants: kUsermenu, kFilemenu, kEditmenu and kNoinstall. These yield the integer values 299, 103, 105 and 0 respectively and those numeric values can be used interchangeably with the names of the corresponding constants for this parameter. So what do these values mean? kUsermenu is the most commonly used constant from this group - at least by default. This large value for the menu position is intended to place the associated menu instance in the rightmost position for custom menus on the main menu bar. Its use is effectively equivalent to not assigning a value to this parameter at all. A menu instance so installed will be assigned the next available order value within the group - higher than all other menus installed so far (with the exceptions I will explain shortly). So if two menu instances are already installed on the main menu bar, they will have order values 1 and 2. If we install a third menu instance and assign it a position parameter value of kUsermenu or 299 (or don't assign a position parameter value at all), it will acquire an order value of 3. This is all very straightforward so far. But there are a couple of exceptional menus we can also install on the main menu bar. Omnis Studio allows us to replace the standard File and Edit menus with our own custom versions. Traditionally, we have used the Replace standard File menu and Replace standard Edit menu method commands for this purpose, but we can also use the two notational techniques mentioned above to perform this job as well - by using the proper position parameter values, of course. Replacing File and Edit Menus Using Notation These special custom menu instances must be positioned to the left of "normal" custom menu instances, so the creators of Omnis Studio have reserved special position values for them. That is the purpose of two of our remaining Menu position constants: kFilemenu and kEditmenu. Custom File Menu Assigning a position value of kFilemenu (or its numeric equivalent of 103) replaces the standard File menu with a custom one. The commands from the standard File menu can be emulated using either standard Omnis Studio method commands or the Standard menu command command followed by the appropriate method reference for that command. We can also add our own twists to these methods and additional methods we deem appropriate for this menu. The order property value of a menu installed in this way is returned as the string "filemenu" (the short description value of kFilemenu). But if we perform a non-effective arithmetic operation on this value (like adding 0 to it or multiplying it by 1), the value reveals itself to still be 103. But Omnis Studio does not treat this as a "larger" value than that of other installed menus. This special reserved value for order places this menu first in the $imenus group. Position values up through 102 and greater than 105 continue to add menu instances to the right end of the menu bar, but 103 simply replaces the File menu in the runtime environment. Custom Edit Menu The standard Edit menu can be replaced in the same way as the standard File menu. We simply use kEditmenu (or its numeric equivalent of 105) as the position parameter value for the new menu instance. The order property value for a menu instance installed in this way is reported as "editmenu", but the numeric value of 105 can be teased out in the same way as described above for the File menu. These special menu instances then appear in the appropriate positions for the menus they replace - and to the left of "normal" custom menu instances on the main menu bar. If both special menus have been replaced, then the "filemenu" instance is first in the $imenus group, followed by the "editmenu" instance, then followed by the "normal" menu instances beginning with the order value of "1". The order in which the commands were executed that installed these menus is not the determining factor in their order in the group. By the way, if they are created properly, many of the menu lines in a custom Edit menu are automatically disabled under the same circumstances as they would be on the standard Edit menu. For example, Cut and Copy are only enabled during data entry when a range of text is selected. The Mystery Position While there is no Menu position constant with a value of 104, this value just begs to be explored by virtue of its numeric position between 103 and 105! In fact, it does exactly what we would expect, which offers additional intriguing possibilities. Using this number as the position parameter value installs the associated menu instance between the File and Edit menus. The order property value for such an installed menu instance resolves to "designmenu". While we lost the "Design" menu during the changeover from Omnis 7 to Omnis Studio, its legacy remains and we can "replace the standard Design menu" with one of our own devising if needed. Most programs on most operating systems do not have a menu between the File and Edit menus. But if you have a need for such a thing, this is how it is created in Omnis Studio. If all the "special" menus slots are used, plus a few others, the $imenus group will be in the following order: filemenu The Non-Position Position Using kNoinstall or "0" as the menu position parameter creates an uninstalled menu instance. This instance is not "officially" part of the $imenus group in that neither the Notation Inspector nor the $imenus.$makelist() method result acknowledges its existence. But it is still accessible using $imenus.<instancename>. A reference to it can be captured by assigning an Item reference variable as the Returns variable of the Do... command used to open the menu in this manner. The shortcut keys of an uninstalled menu instance like this cannot be used to directly execute their methods, but these methods can still be invoked using explicit or implicit notation. That is, we can invoke any public method of such a menu through "messaging" without the menu appearing on the menu bar. We must remember that such an uninstalled menu instance exists since the $imenus group does not report it as a member. The order property value of a menu instance "not installed" in this manner is reported as "notinstalled", which resolves to a value of "0" when manipulated as mentioned above. More than one menu can be instantiated in this manner. All such menu instances will have the same order property value. To Be Continued Next time we will examine possible uses of these features and move on to the general subject of methods in installed menus.
|
|
| © 2002-2003 Copyright
of the text and images herein remains with the respective author. No part
of this newsletter may be reproduced, transmitted, stored in a retrieval
system or translated into any language in any form by any means without
the written permission of the author or Omnis Software. Omnis® and Omnis Studio® are registered trademarks, and Omnis 7™ is a trademark of Omnis Software Ltd. Other products mentioned are trademarks or registered trademarks of their corporations. All rights reserved. |


 Please logon or create a free account to download this file.
