Tech News Back Issues Issue: 111303
|
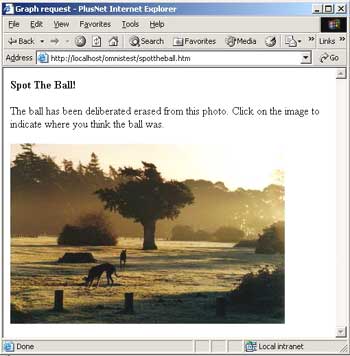
Introduction to the Omnis Web Client: Part 22, Spot The Ball - Layering images in the html interface By Dr Caroline Wilkins In the previous newsletter, we created an example application to demonstrate how a user click within an image on an html page can be detected and responded to, according to where on the image they had clicked. We used a "Spot the Ball" game as the example. The concept was that a user should click the point on a photo where they thought a ball would be, this position data was sent to a remote task via the html form, the distance from the target position was calculated and a user was told whether they were close, close enough or had entirely missed the target.
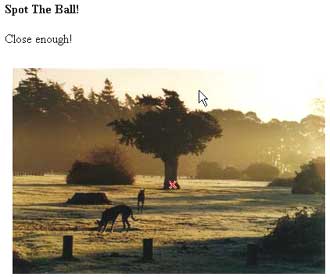
At the end of the newsletter, I suggested that we might make a more sophisticated response to the user by marking the spot on the image they had selected. As I have since had requests from readers to elaborate, this article will do just that! 1. X marks the spot!1.1 You will need an X graphic, or whatever symbol you would like to
use. You can make your own (make sure you use a transparent background
and an image format that will support transparency such as gif or tga).
Alternatively, you can download a gif containing a red cross over a transparent
background (spottheball.zip). We will assume
that 10x10 pixel image is being used, for the purposes of positional calculations
in the Omnis library. 2. HTML LayersHTML layers enable a designer to exert considerable control over position of images and text on an html page. (I have used layering techniques on www.hwarena.com). There can be some cross-platform and browser issues, so it is worth deploying this technique with care and testing across target browsers. The syntax is fairly simple and self-explanatory. If you were to add the following to your start page for the Spot the Ball demo (c:\Inetpub\wwwroot\omnistest\spottheball.htm ), you would see the red cross image superimposed on the background image. <div id="Layer1" style="position:absolute; width:10px; height:10px; z-index:1; left: 270px; top: 275px"><img src="images/redcross.gif" width="10" height="10"></div> Analysing this, we see that it consists of a <div> and a </div> tag with an image tag between them. <div> indicates the start of the layer declaration and </div> the end. This section of code can be placed anywhere within the body of the html document, but is often put at the top or bottom of the page for the sake of neatness. This example of a layer is given the name "Layer1" and its style attribute specifies that the position of the layer should be absolute, has height and width of 10 pixels, is 270 pixels from the left and 275 pixels from the top of the browser window. The z-index controls the layering. Higher values of z will cause a layer to be drawn over the top of layers with lower values. In this example, we are using the html page as a flat background, with an effective z-index of zero, so the layer with the cross image will be superimposed on the background. You can experiment with this by adding more layers of different sizes, locations and z-indexes. 3. The initial html pageWe continue with the spottheball.lbs library that we developed in the previous newsletter. You can download it from here (spottheball.zip), if you don't already have it. So that we can be certain of the position on the browser window of the image that the user clicks, we place this in a layer of its own. Edit the source of the spottheball.htm page that we created last time (c:\Inetpub\wwwroot\omnistest\spottheball.htm ) so that it now looks like: <HTML> <div id="Layer1" style="position:absolute;
width:200px; height:115px; z-index:1; left: 20px; top: 100px"> <B>Spot The Ball!</b> </BODY> We have created a layer of width 200 pixels that is placed 20 pixels from the left and 100 pixels from the top of the browser window. 4. The html template For the html template that we will use to formulate a response to the user, we need to add an additional layer to contain the red cross graphic. Replace the html source of the template file (c:\Inetpub\wwwroot\omnistest\spottemplate.htm ) with the following: <HTML> <div id="Layer1" style="position:absolute;
width:200px; height:115px; z-index:1; left: 20px; top: 100px"> <div id="Layer2" style="position:absolute;
width:10px; height:10px; z-index:2; left: @[xPos]px; top: @[yPos]px"><img <B>Spot The Ball!</b> </BODY> Note that this is identical to spottheball.htm, except that it has an additional layer, "Layer2" and has full paths to image resources. The strings @[xPos] and @[yPos] are put in as convenient and unambiguous place markers which we can replace with calculated values in the remote task. 5. The remote taskOnly two lines need to be added to the remote task in order to place the cross on the template html file we have created. If you place the following 2 lines into the remote task $construct method, under the "Customise html template..." comment, this will be sufficient to position the layer containing the cross graphic : Calculate lHTML as replaceall(lHTML,'@[xPos]',15+lXcoord) The entire remote task method should now look like this: Calculate lXcoord as pParams.c4 ; Game code - determines message back to user ; Read template HTML from file ; Customise html template to include message to
user. ; Stream web page direct to user - no temp files
required on server If you now test the entire interface, you should find that clicking on the image in the initial http://localhost/omnistest/spottheball.htm page causes the remote task to return a page containing both the initial large image and a small red cross image superimposed at the point which you previously selected, along with a message to tell you how close your guess was to the target co-ordinate. This technique could obviously be applied to a range of applications where it is desirable to layer images either statically or determine the relative position of layers dynamically on the webserver.
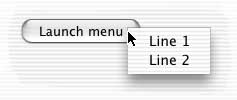
Popup Menu CommandsBy David Swain This is the last article in the series on menus in Omnis Studio. There is only one more way to deploy a menu instance that we haven't discussed: using the Popup menu method command. This differs significantly from the Popup menu fielddiscussed earlier and is worth mentioning for its versatility (if not its obscurity). There are actually two method commands that contain the phrase "Popup menu". The second is the Popup menu from list command, which we will also examine in this article. But first, the classic "popup menu"... The Popup Menu CommandEssentially, this command makes an instance of a given menu class appear...somewhere. By default, it appears at the current position of the mouse cursor (so the user can easily use the mouse to select a menu item), but we can choose to open the menu instance at a different location if we so desire. This menu instance is quite ephemeral. It comes into existence, is used and vanishes during the execution of a single method command. During its brief existence, it floats wherever it was spawned. It displays no title, but only menu lines. If the user happens to click elsewhere on the screen or presses the Enter/Return key before a menu line is highlighted, the menu instance simply vanishes unused...unfulfilled...its momentary existence not even acknowledged...
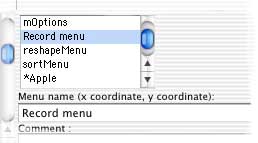
While the popup menu instance exists, the user is in a position to select a line from the exposed menu or click elsewhere on the screen to simply put the menu away. But the user is not obligated to use the mouse to select an item from the presented menu. The up- and down-arrow keys can also be used to navigate this menu and the Enter/Return key(s) can be use to make the ultimate selection. Any shortcut keys defined for the exposed menu instance can also be used. If the Enter/Return key is pressed before a menu line is highlighted, the menu instance is destroyed without executing a menu line. This method-launched popup menu instance works like a context menu instance in many ways, but it can be launched as the result of a wider range of actions than just a context click. The Popup menu command can be put into any method anywhere in our applications. It is up to us to determine when this is appropriate... When such a popup menu is instantiated, the application is put into a "state of pending selection". That is, method execution pauses until the user selects a menu item of clicks somewhere off the presented menu. Execution of the selected menu line acts as if a subroutine had been called and processing briefly branches to the menu method chosen by the user. When execution of the method from the menu is completed, execution of the method that contains the Popup menu command continues. The setup for the Popup menu command is extremely simple. We only have to name the Menu Class from which our popup menu is to be spawned. A convenient list is provided for selecting the class name, but square bracket notation is also supported here if we need to determine the menu name through a calculation. We also have the option of specifying a position for the popup menu, but we will discuss that later in this article.
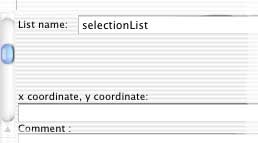
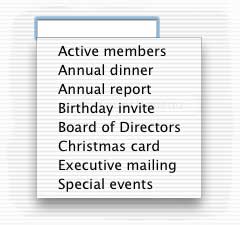
The Popup Menu From List Command The Popup menu from list command presents a one-column list in the same manner as a popup menu. A typical use would be to present a selection list associated with a field, but other uses will no doubt occur to you. The values presented as line labels in this menu are those found in the first column of the list named in the Popup menu from list command. Again, the setup is simple. We just name the list variable to be presented. The positioning coordinates are again optional. If they are not supplied, the list is presented at the mouse location for the convenience of the user.
Extremely large lists cannot be fully accommodated in the menu presented by this command, but I had no problem with a list of 66 lines (State and Province names for the US and Canada). (The truncation limit is probably in the thousands - a number that would be impractical for a selection list anyway.) If the resulting menu is too tall for the screen, it is given scroll arrows at the top and/or bottom and the user can scroll through the lines with their mouse or by using the up- and down-arrow keys on the keyboard. There is no support for keyboard shortcuts with a popup list like we have with many of the list display fields. That is, we cannot begin typing the desired string from the list and have the first line that matches our typing selected. But we can use the up- and down-arrow keys to move the highlight from one line to the next and then select the highlighted line using the Enter/Return key. As with the Popup menu command, method execution pauses until the user selects a list line or clicks elsewhere on the screen. The list line selected by the user is not automatically processed in any way. All that happens is that the line on which the user clicks becomes the current line in the associated list variable. We can use the lst() function or list notation to then access column values from that line for further processing in the method that launced the popup list. For example, we could cause a selection list to appear if the user types a "?" in an entry field and then place the value of the name column from that list into the field:
Of course, we have no control over where the selection list will appear with this code, but we can fix that... Positioning the MenuWith either of the Popup menu commands, we have the option to specify a location for the upper left corner of the menu image. These x- and y-coordinates are not relative to a window, however, since we may launch a popup menu or list even when no windows are open. So we have to use a more global coordinate system. The exact position of the origin of the coordinate system used for this positioning varies from one platform to another, but the general rule is that on Windows the origin is the upper left corner of the Omnis Studio window, just under the menu bar, while on Macintosh and Linux the origin is the very upper left corner of the monitor area (above the menu bar). So if we want to place the selection list just below our entry field (to simulate the list presentation of a Combo box field), we have to do a little arithmetic. On my Mac OS X machine, I determined that the following placed the selection list directly under the entry field:
On Windows, a smaller vertical offset would be needed since we do not have to compensate for the height of the Omnis Studio menu or toolbar. The Persistent PopupIf it is undesirable to allow the user to avoid selecting from the popup menu or list, we can be more forceful in insisting on their cooperation. If the popup menu or list is not used, the Flag is cleared to kFalse. We can use this to cause the menu to reappear until it is acted upon - kind of like a puppy that wants to go outside... One way to do this is to simply put the Popup menu command in a Repeat loop like this:
If we don't specify coordinates, the menu instance will follow the mouse pointer around until the user finally clicks on it. When To Use PopupsThe Popup menu and Popup menu from list commands can be used anywhere. They are not restricted to specific kinds of method like the On command (which is only valid in an event handling method). In fact, they are not even restricted to being launched from a window method. We can have a popup menu or list appear as part of a report process if we can think of a good reason to do so!
|
|
| © 2002-2003 Copyright
of the text and images herein remains with the respective author. No part
of this newsletter may be reproduced, transmitted, stored in a retrieval
system or translated into any language in any form by any means without
the written permission of the author or Omnis Software. Omnis® and Omnis Studio® are registered trademarks, and Omnis 7™ is a trademark of Omnis Software Ltd. Other products mentioned are trademarks or registered trademarks of their corporations. All rights reserved. |


 Please logon or create a free account to download this file.
